Review Test Results
NetDevOps
  • Introduction
  • CXTM Basics
  • CXTM Projects
  • CXTM Test Cases
  • CXTM Test Automation
  • Revisit Imported Test Cases
  • CXTM Batches
  • CXTM Notifications
  • NetDevOps
  • CXTM Reporting
  • CXTM References
  • Bonus: Project Users
  • Bonus: CXTM REST API
  • Bonus: Secret Env Variables

Review CXTM Test Results

Recall that earlier in the lab you enabled Batch Notifications to be sent to an LTROPS-2711 - CXTM Notifications Webex space when your CXTM batches complete their runs. Now that your batches have been successfully run in the pipeline, notifications should have been sent to that LTROPS-2711 - CXTM Notifications space using the templates you configured earlier.

Step 1 - Review Batch Notifications in Webex

Hopefully you caught the Webex notifications for your pod (pod21) in real time. If not, review the screenshot below for an example of what you would have seen in the Webex space, and take note of the following.

  1. Batch title
  2. Batch run result (The list of test cases that were run in the batch, and their results)
  3. A link to your project's Batch Result page where you can review the detailed results of the batch run


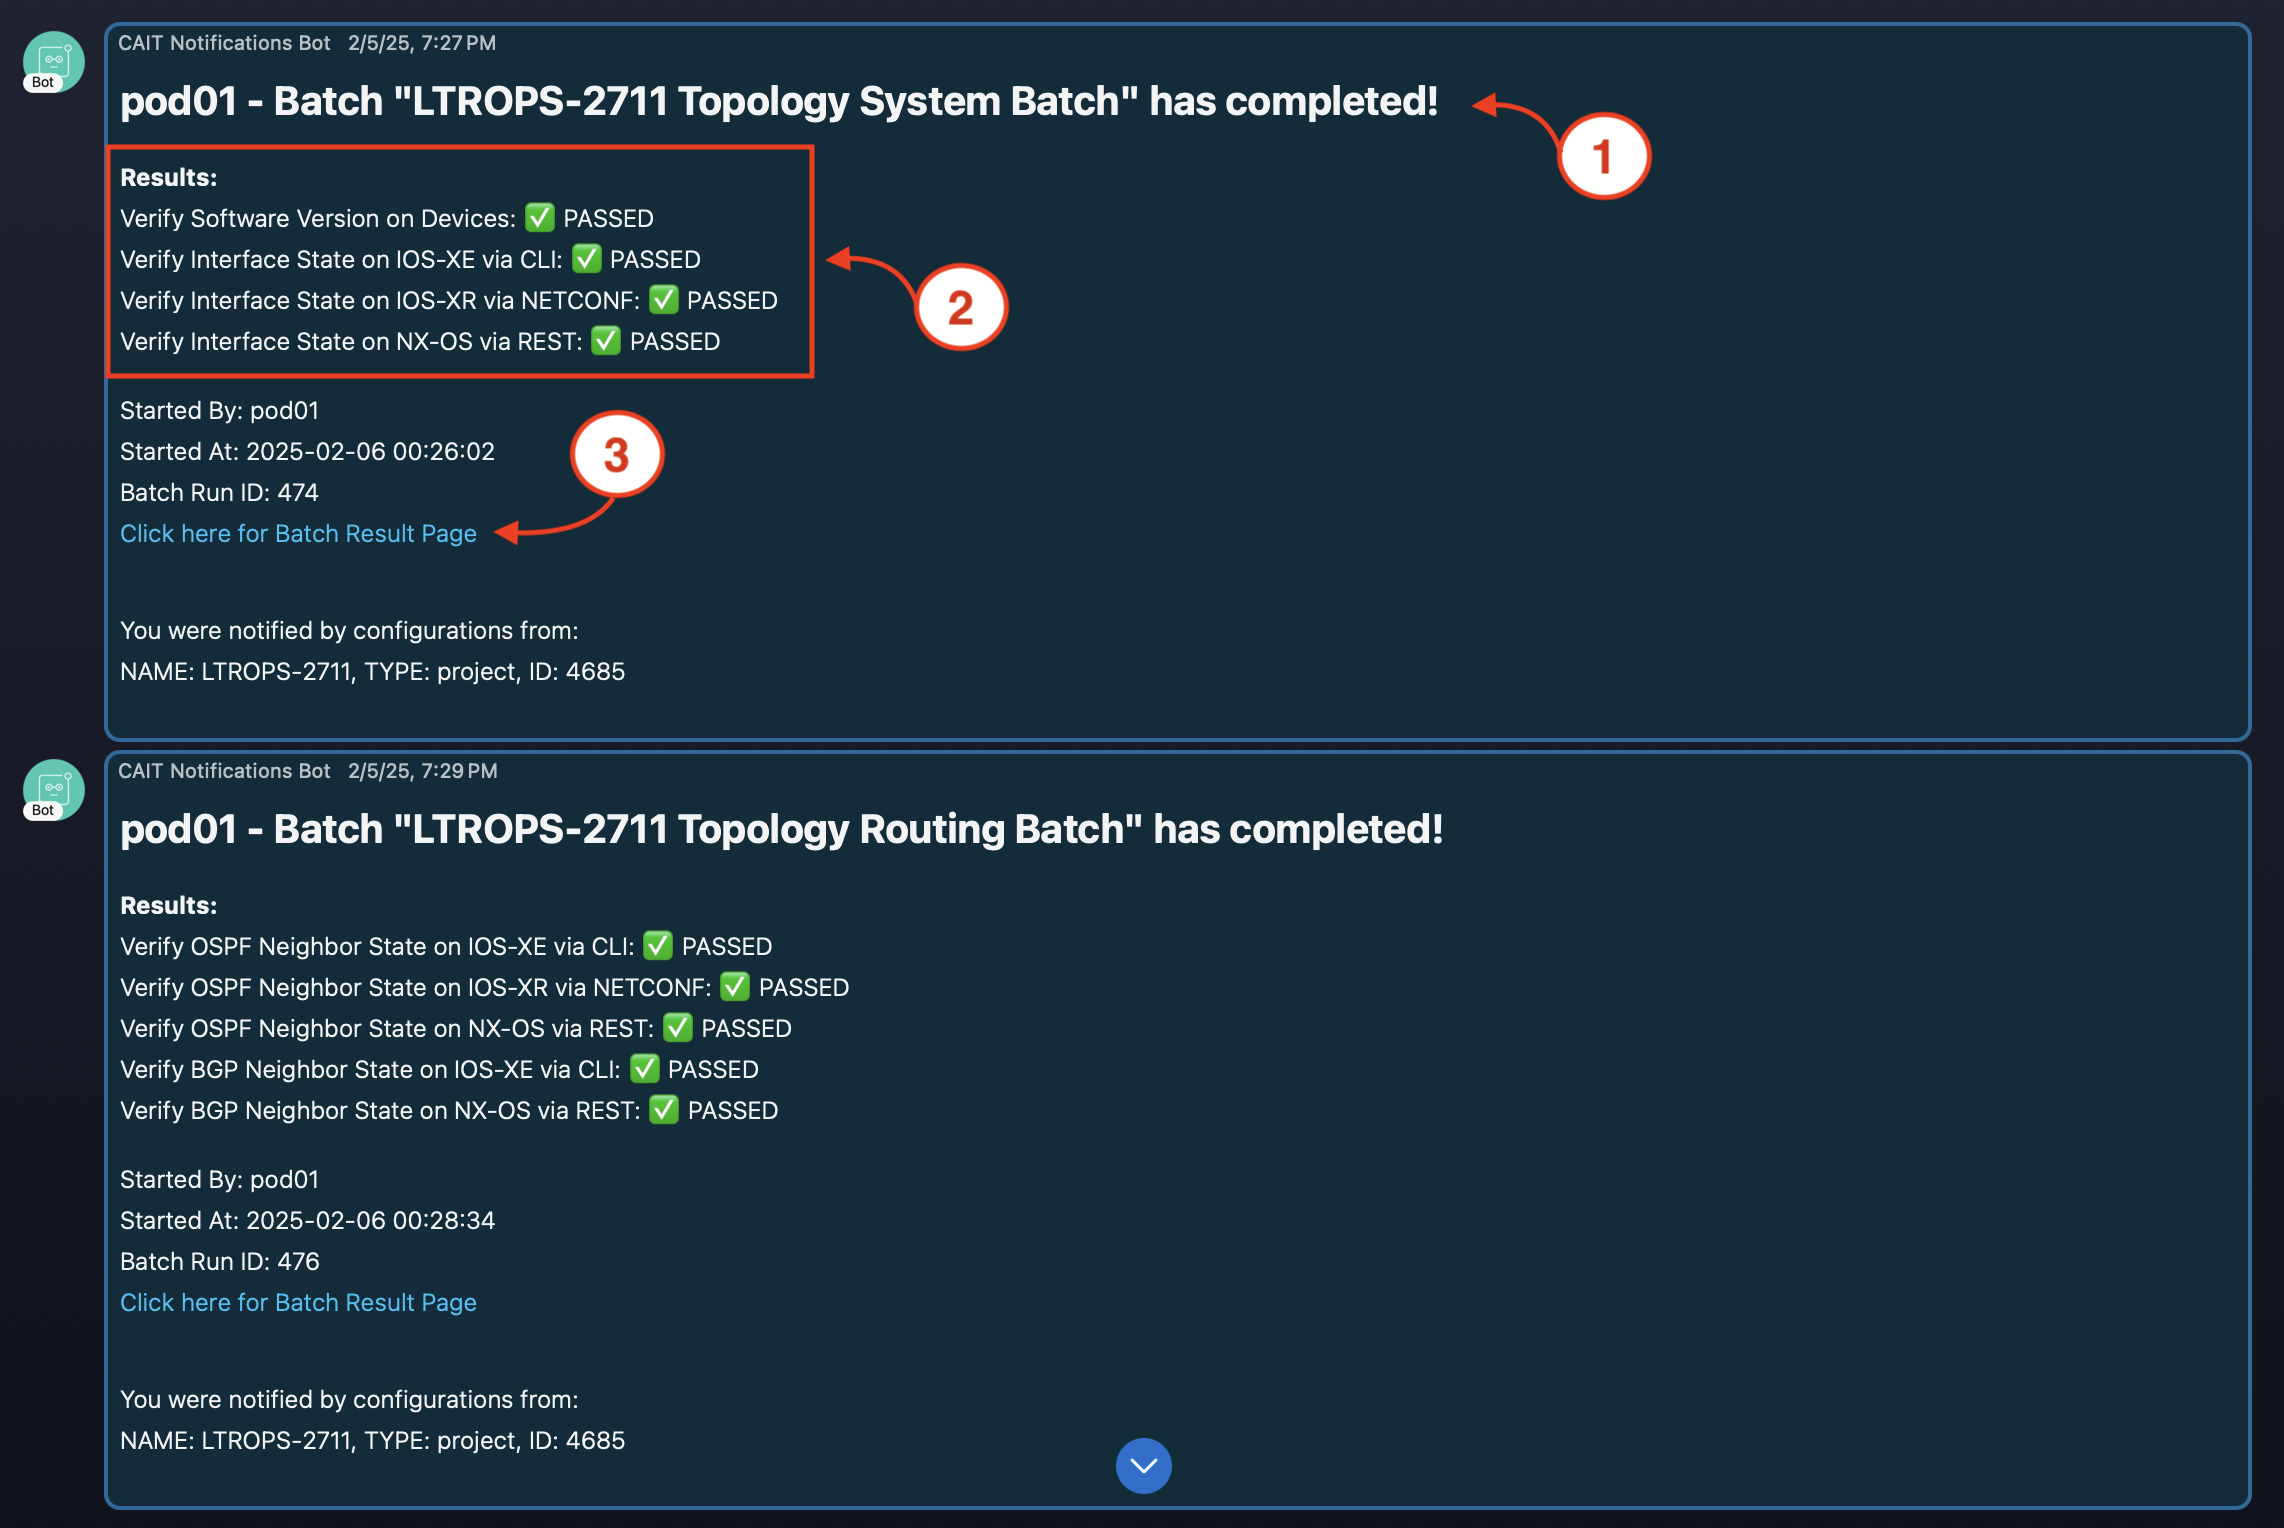
As mentioned, the link provided in the Webex notification will take you directly to the Batch Result page for your project, where you can drill down into individual test case results and review the detailed logs for Passed or Failed test cases.


Step 2 - Navigate to your CXTM Project's Batches page


Return to your CXTM browser window

  1. Open the sidebar if not already open
  2. Scroll down until you locate the heading Test Cases
  3. Under Test Cases, click Test Case Batches


Step 3 - Review the Verify BGP Neighbor State on IOS-XE via CLI test case


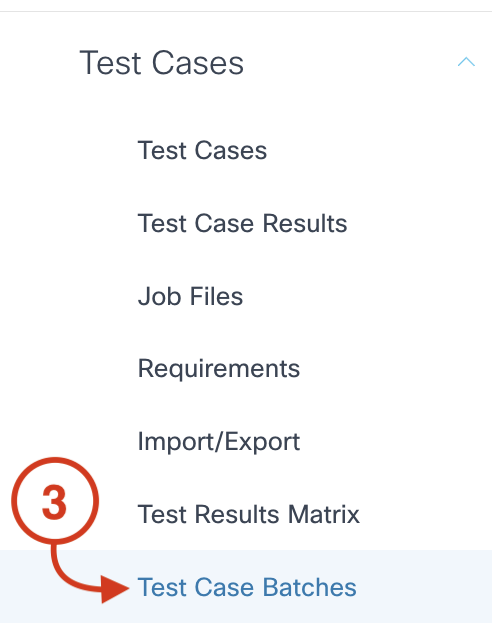
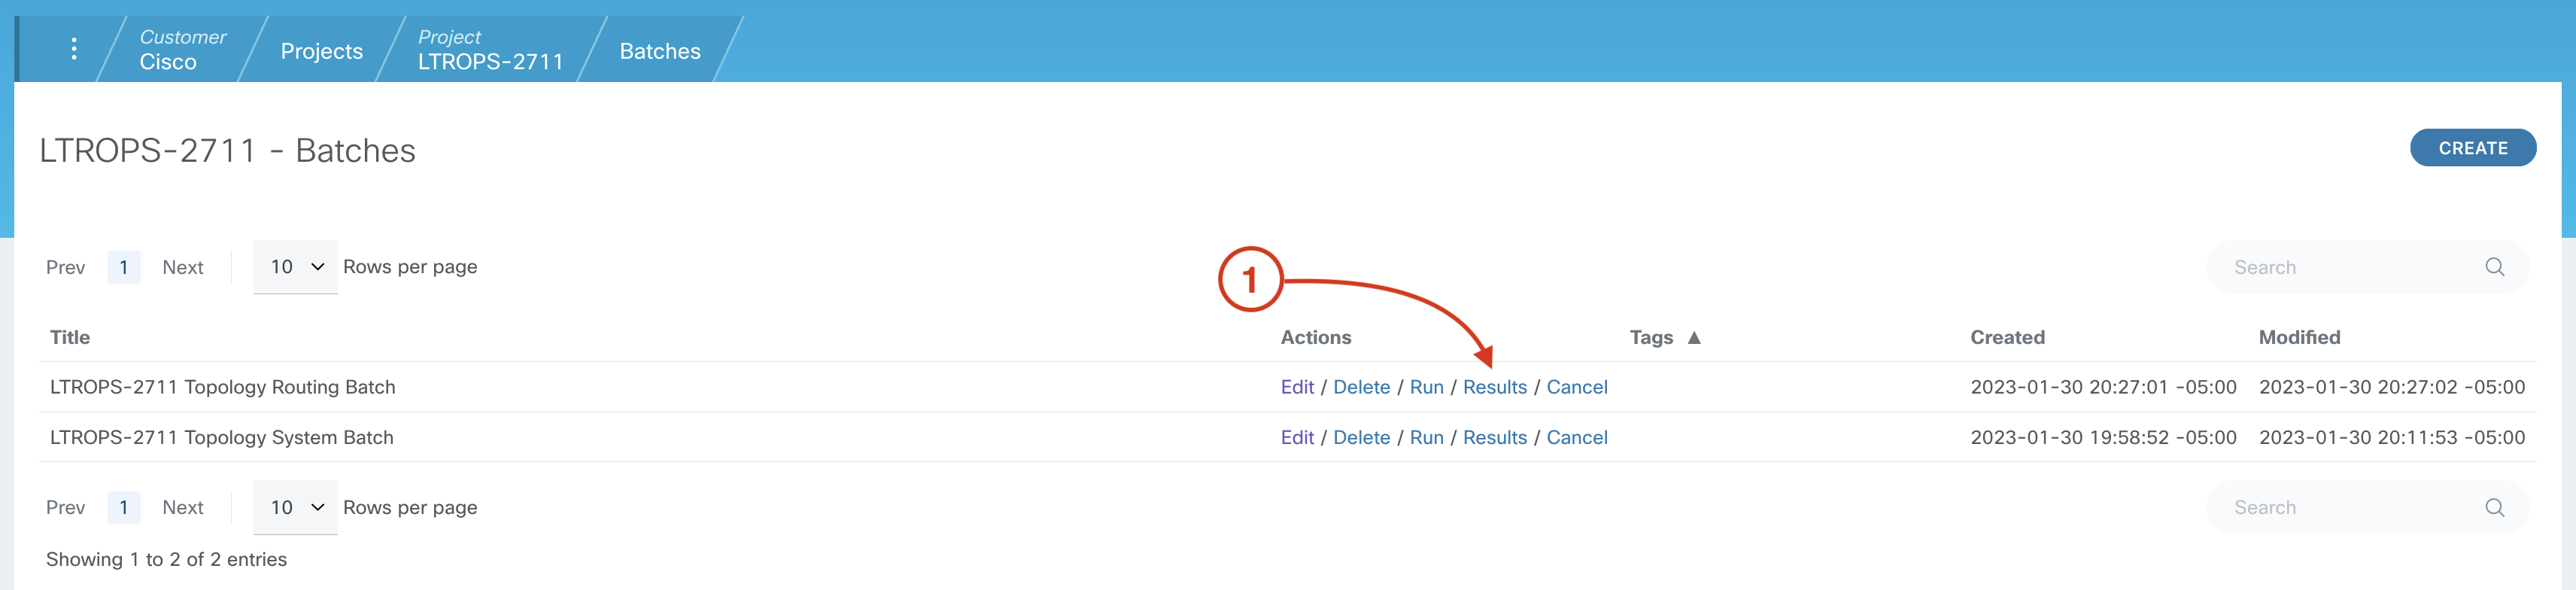
From your project's Batches page:

  1. Click on the Results link for the LTROPS-2711 Topology Routing Batch


  2. Click on the Details link associated with the Verify BGP Neighbor State on IOS-XE via CLI test case
  3. Click on the on log.html link under Artifacts to open the Jobfile log


  4. This link opens a detailed log.html report ("Jobfile Log") for all the procedures executed in the Job File.


  5. Click on TEST 2. VERIFY ALL CONFIGURED BGP NEIGHBOR STATES ESTABLISHED FOR THE GIVEN DUT to expand
  6. Click on FOR ${DEVICE} IN [ @{DEVICES} ] to expand
  7. Click on ITERATION ${DEVICE} = CSR1Kv-01 to expand
  8. Click on FOR ${neighbor} IN [ @{neighbors} ] to expand
  9. Click on ITERATION ${DEVICE} = C8Kv-01 to expand
  10. Click on FOR ${neighbor} IN [ @{neighbors} ] to expand


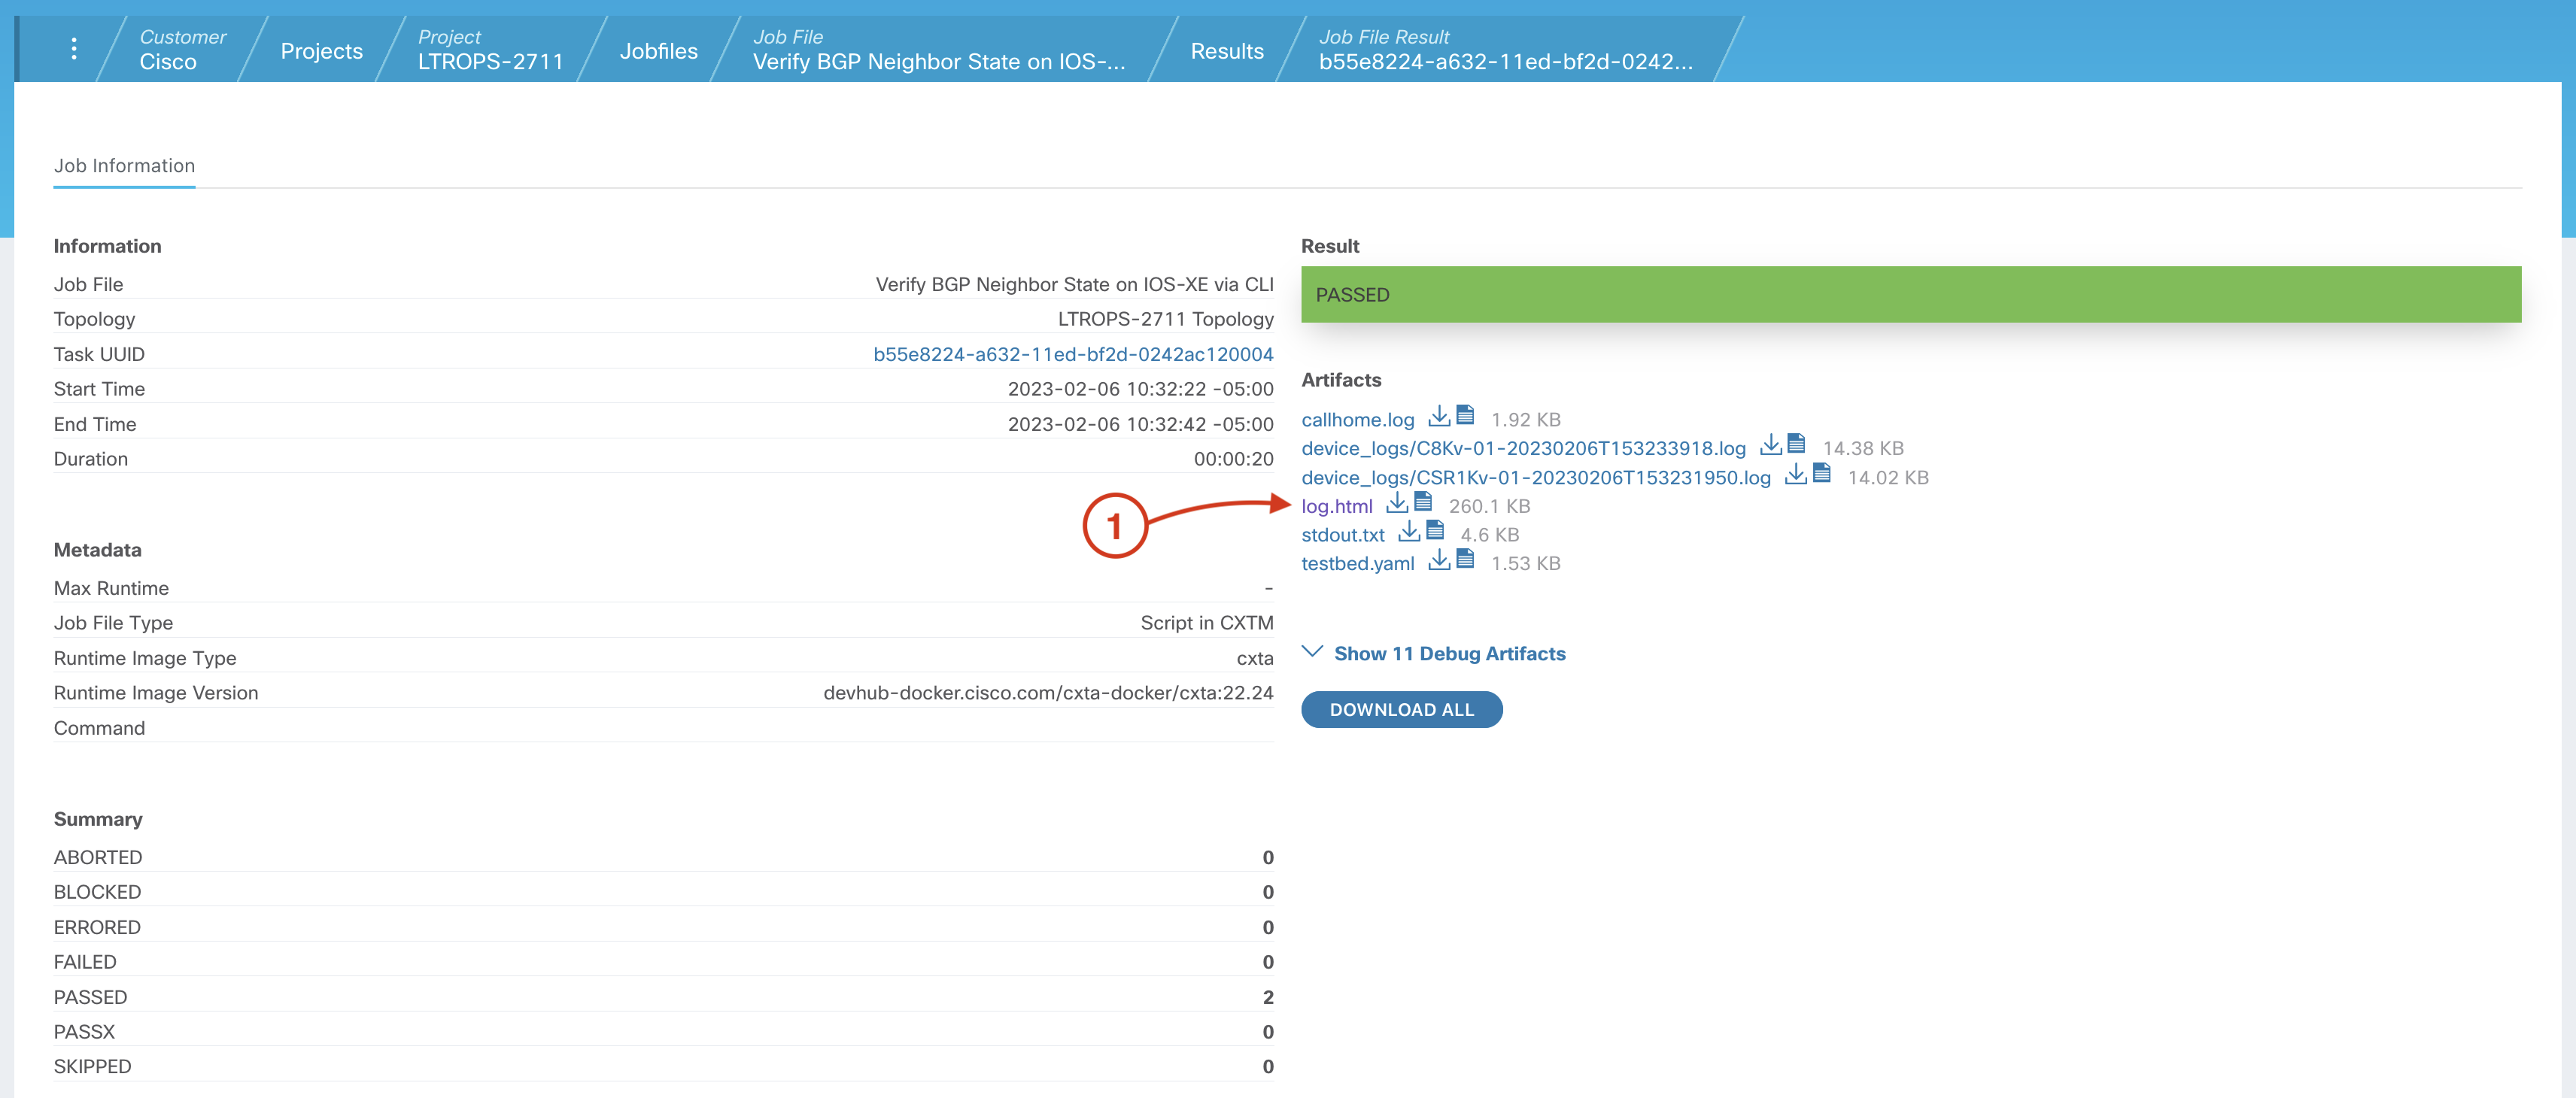
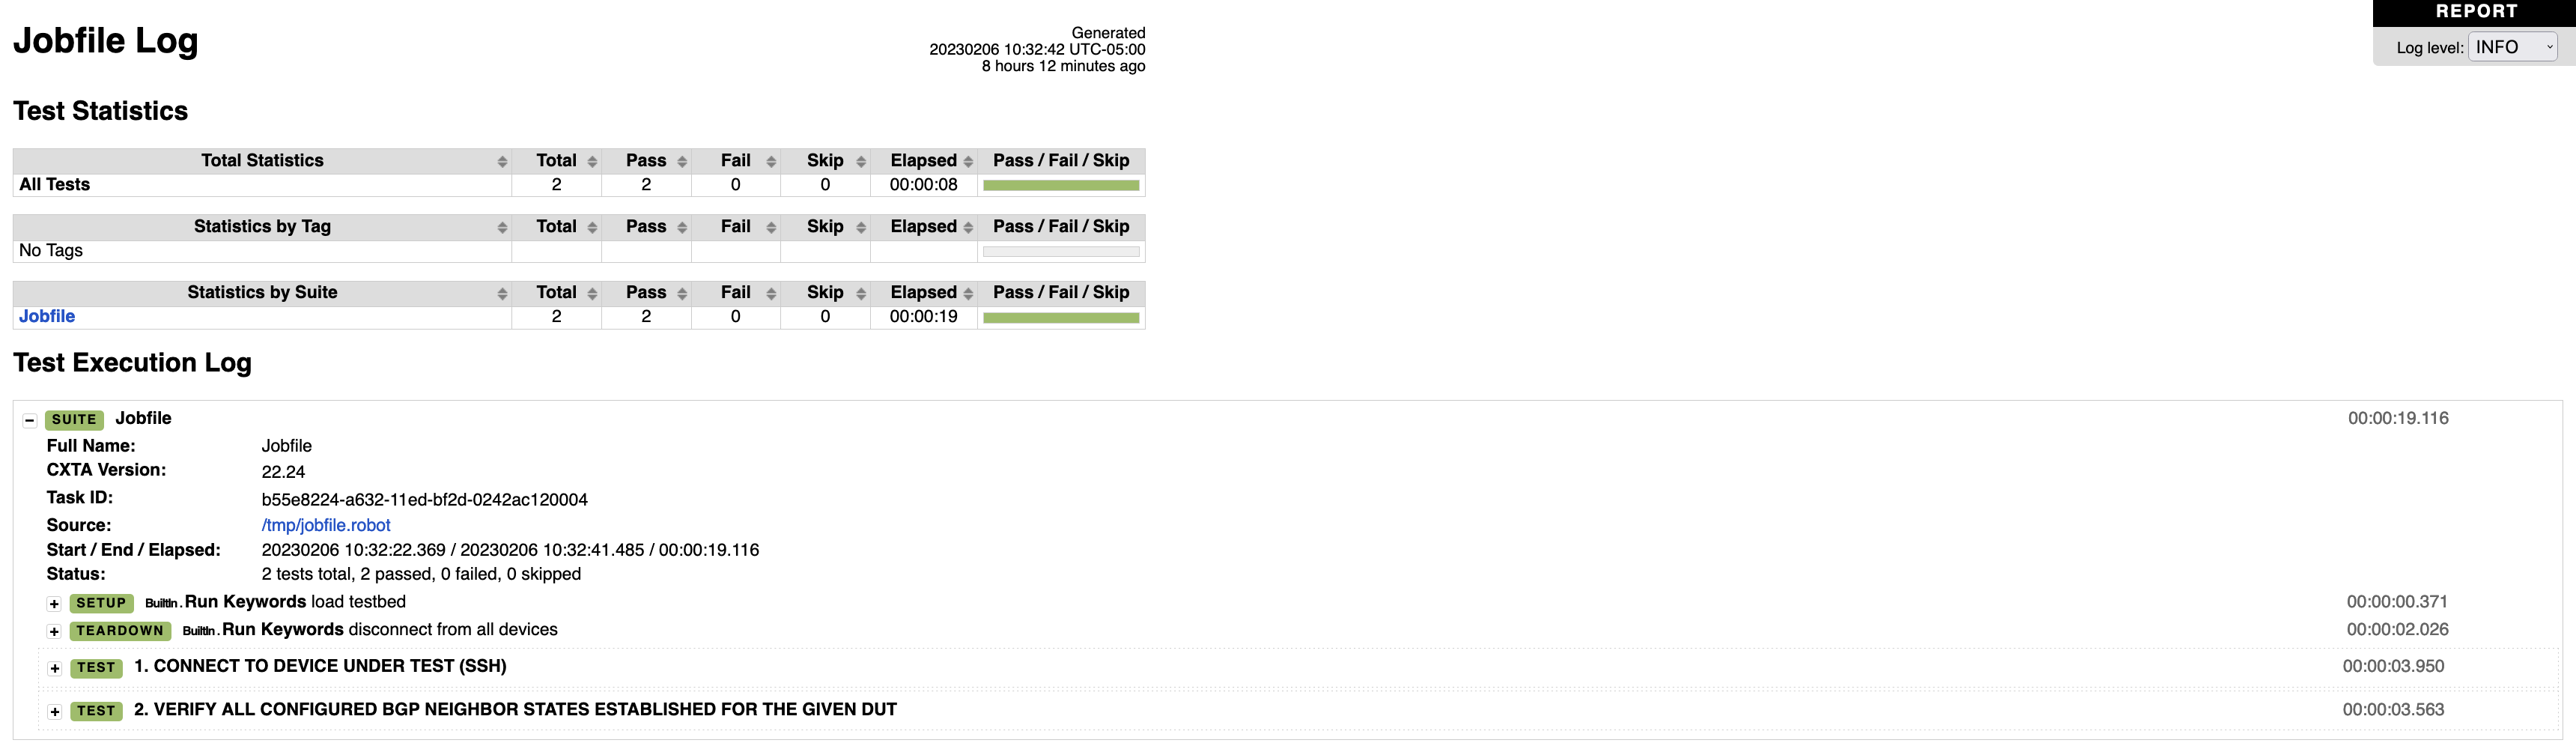
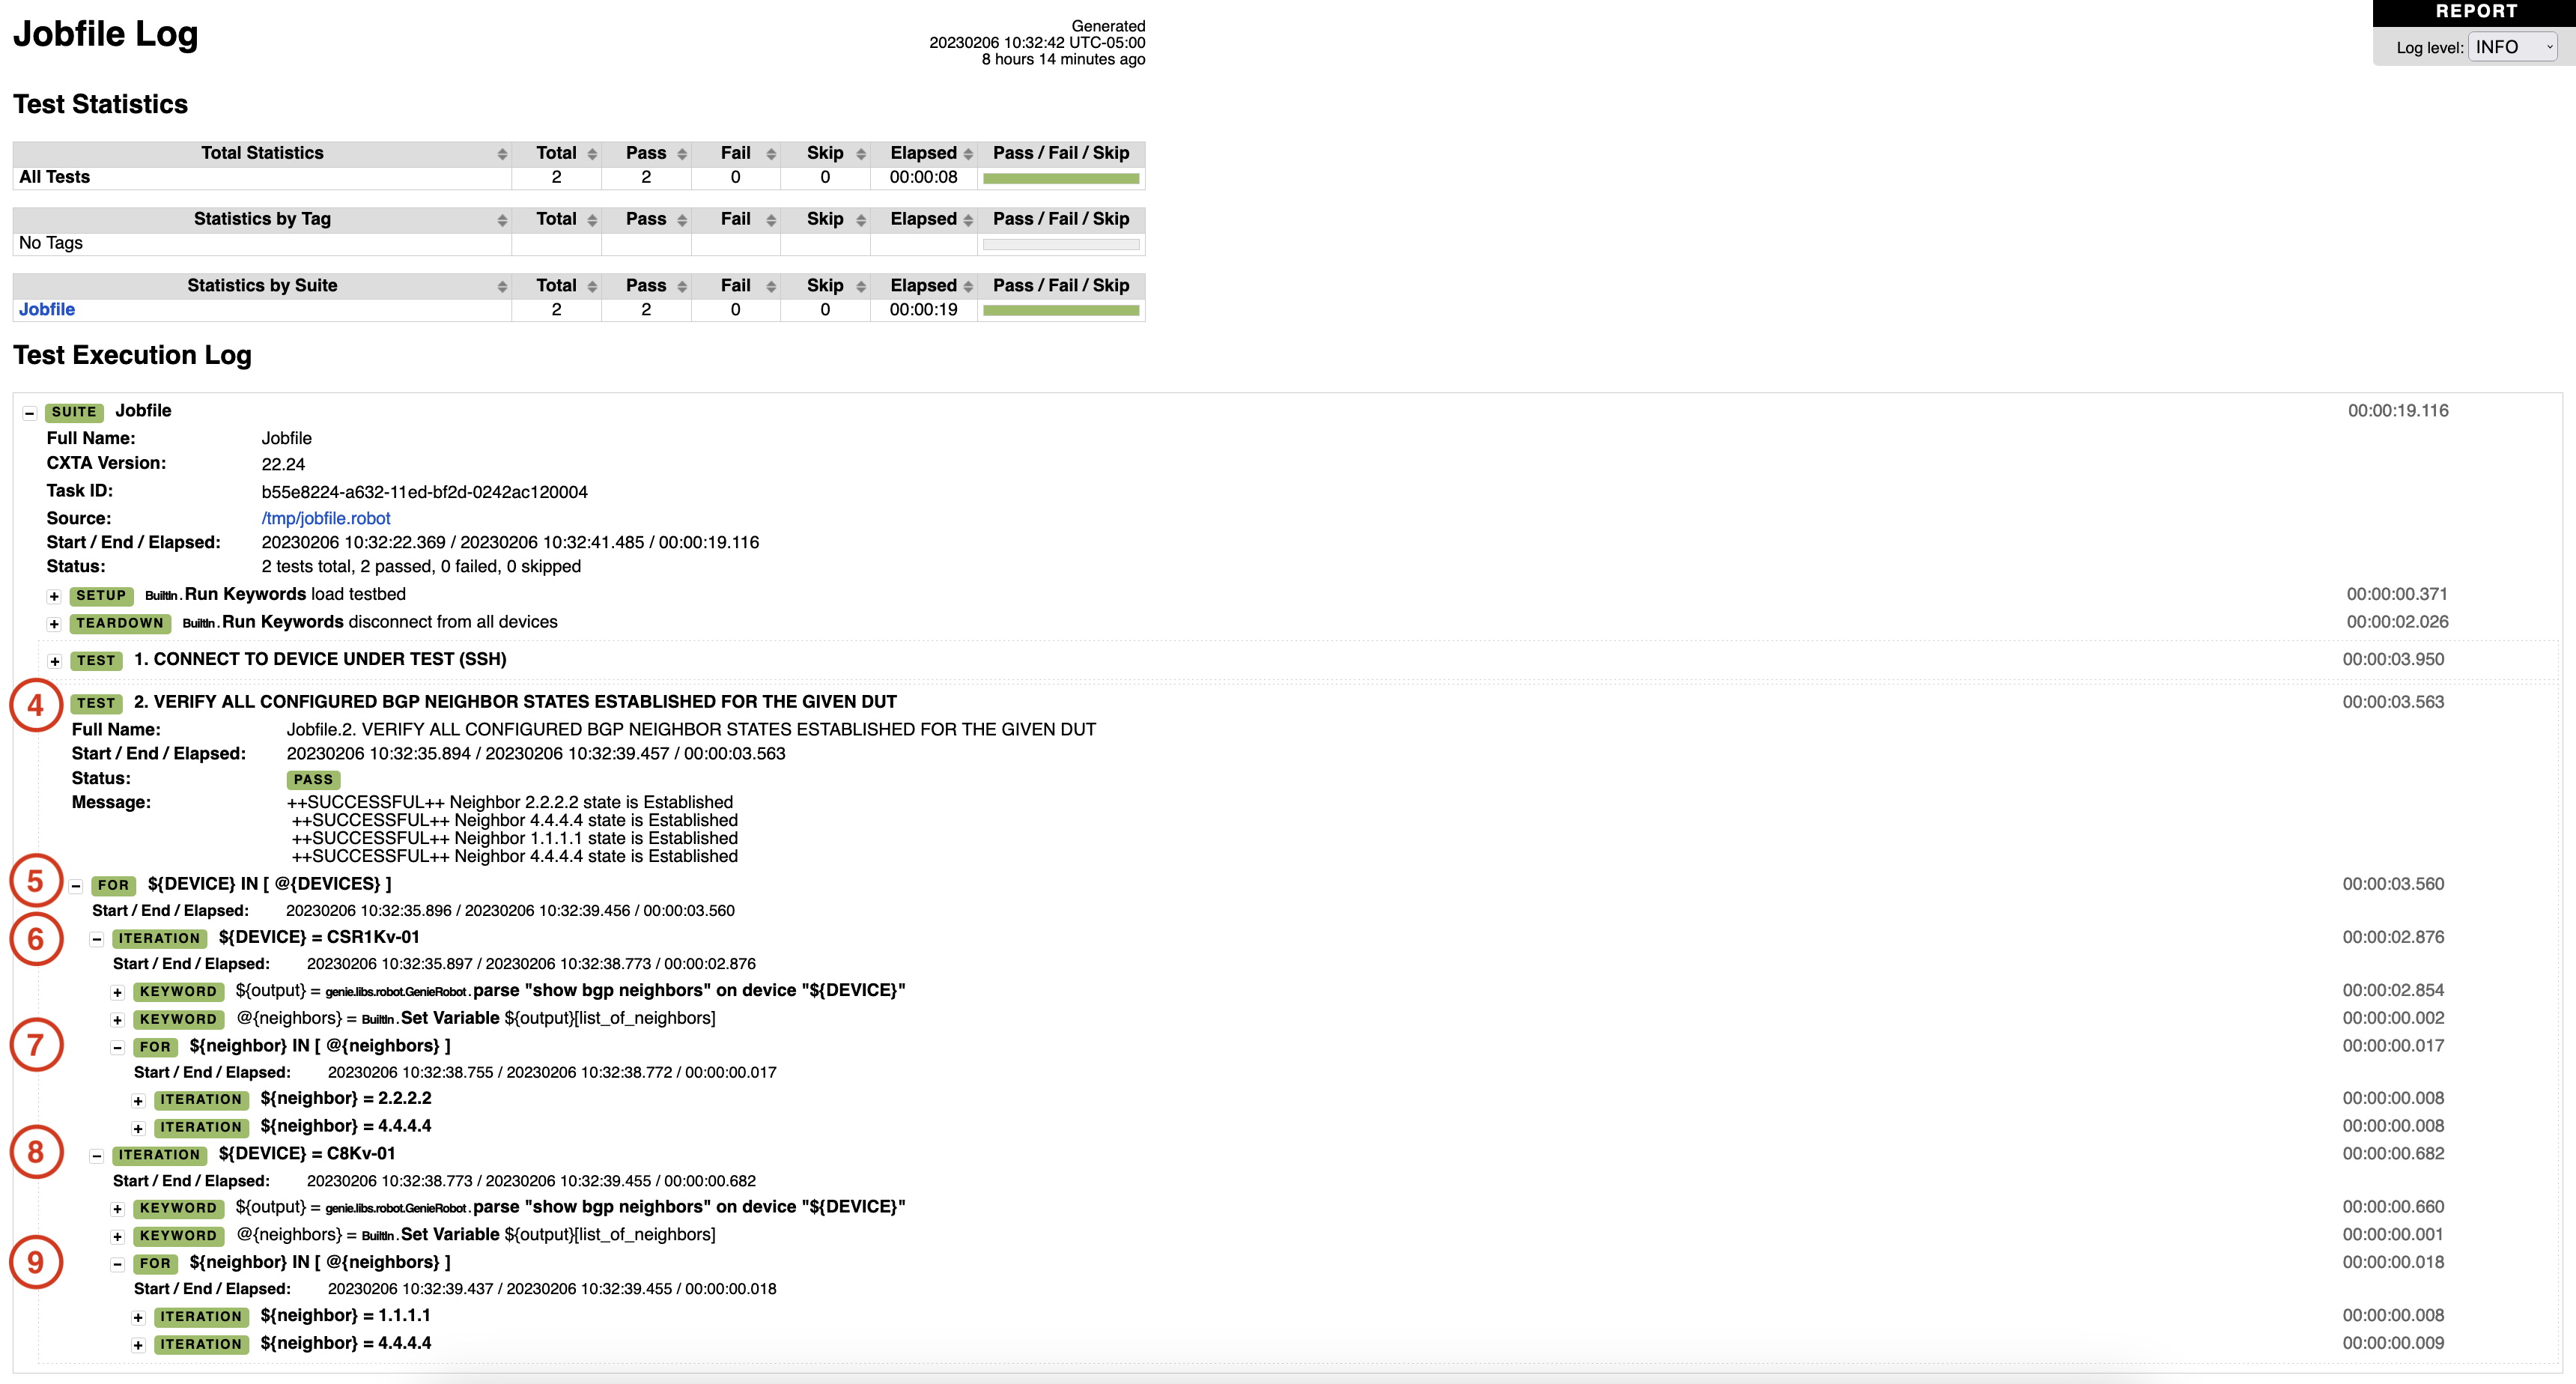
  11. Compare this expanded output to the output you reviewed earlier after first running this test case in a batch. In this expanded output, notice that this test case has now iterated over both the CSR1Kv-01 and C8Kv-01 devices since you added C8Kv-01 to the DEVICES list earlier in the lab. Also, notice, now that the proposed configurations hae been pushed in the pipeline, that CSR1Kv device now has two BGP peers. It's now peered to 2.2.2.2 (the newly configured C8Kv-01), in addition to the peering to 4.4.4.4 (your N9Kv device) that was seen before.

    Also notice that the C8Kv device has two BGP peers. One to 1.1.1.1 (the CSR1Kv device) and one to 4.4.4.4 (your N9Kv device).


  12. Close the Jobfile log and return to the Job File Results page


Continue to the next section to review CXTM reporting now that your pipeline has run successfully.