Now that you have an understanding of Robot Framework and the CXTA collection of libraries, you will automate the test case that you added to your project earlier in the lab. In this section, you will develop a fully automated test case that utilizes the information you provided through the topology file created in the last section to connect to the devices in your testbed and verify that they are all running the expected software version.
Later in the lab, this same test case will be included in your pipeline to help verify that the testbed is in the desired state before introducing a configuration change.
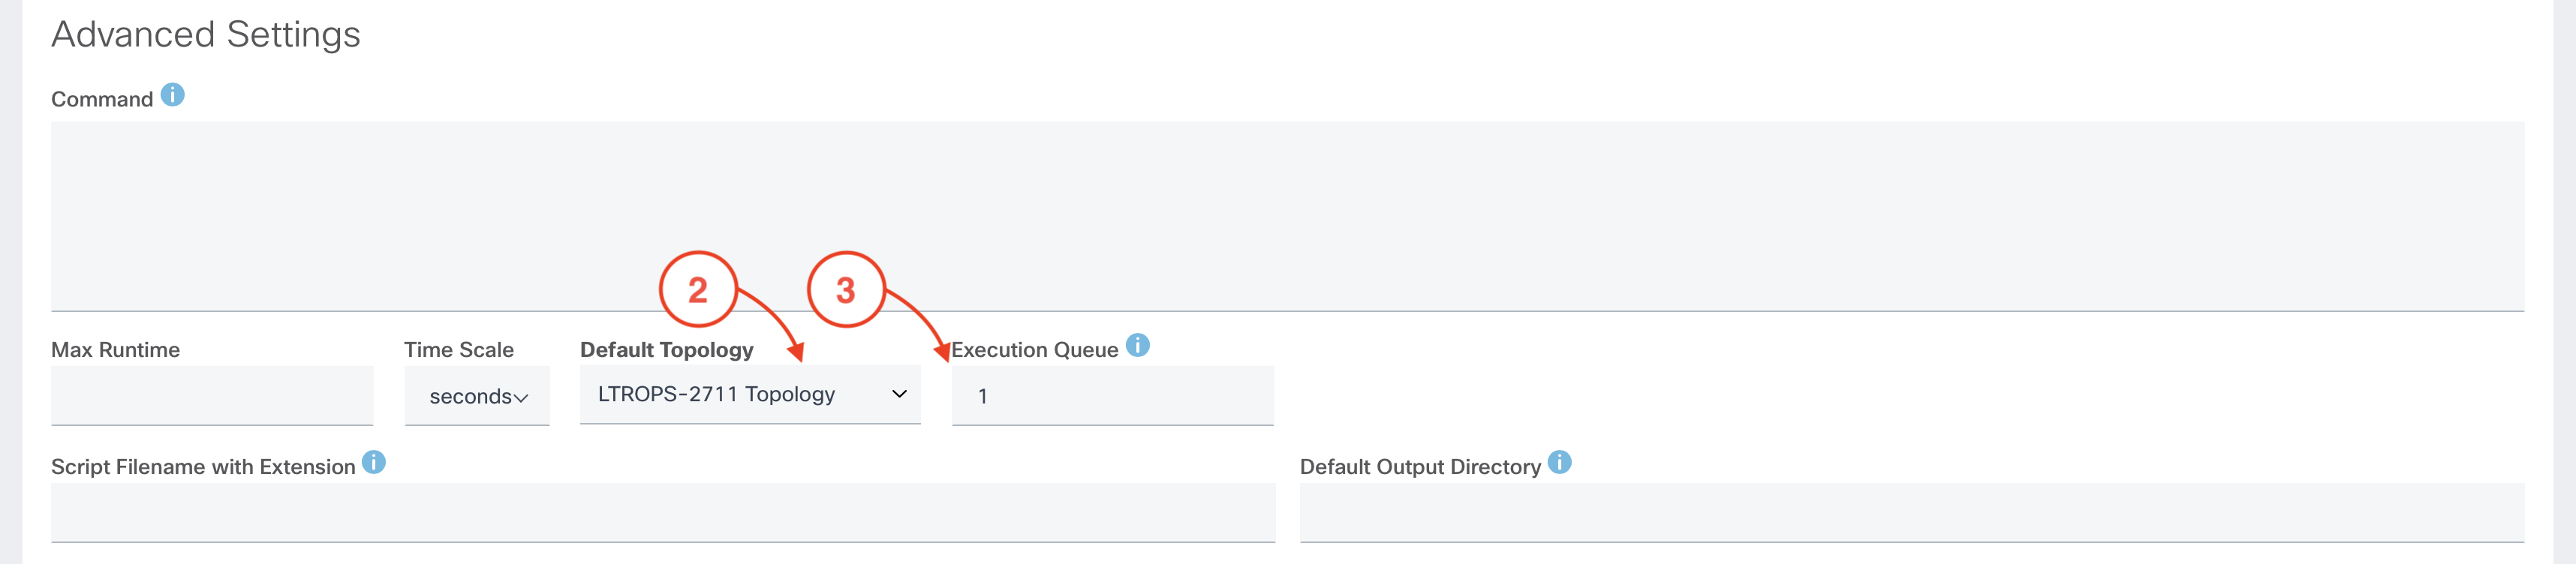
From the Test Cases page in your LTROPS-2711 project:

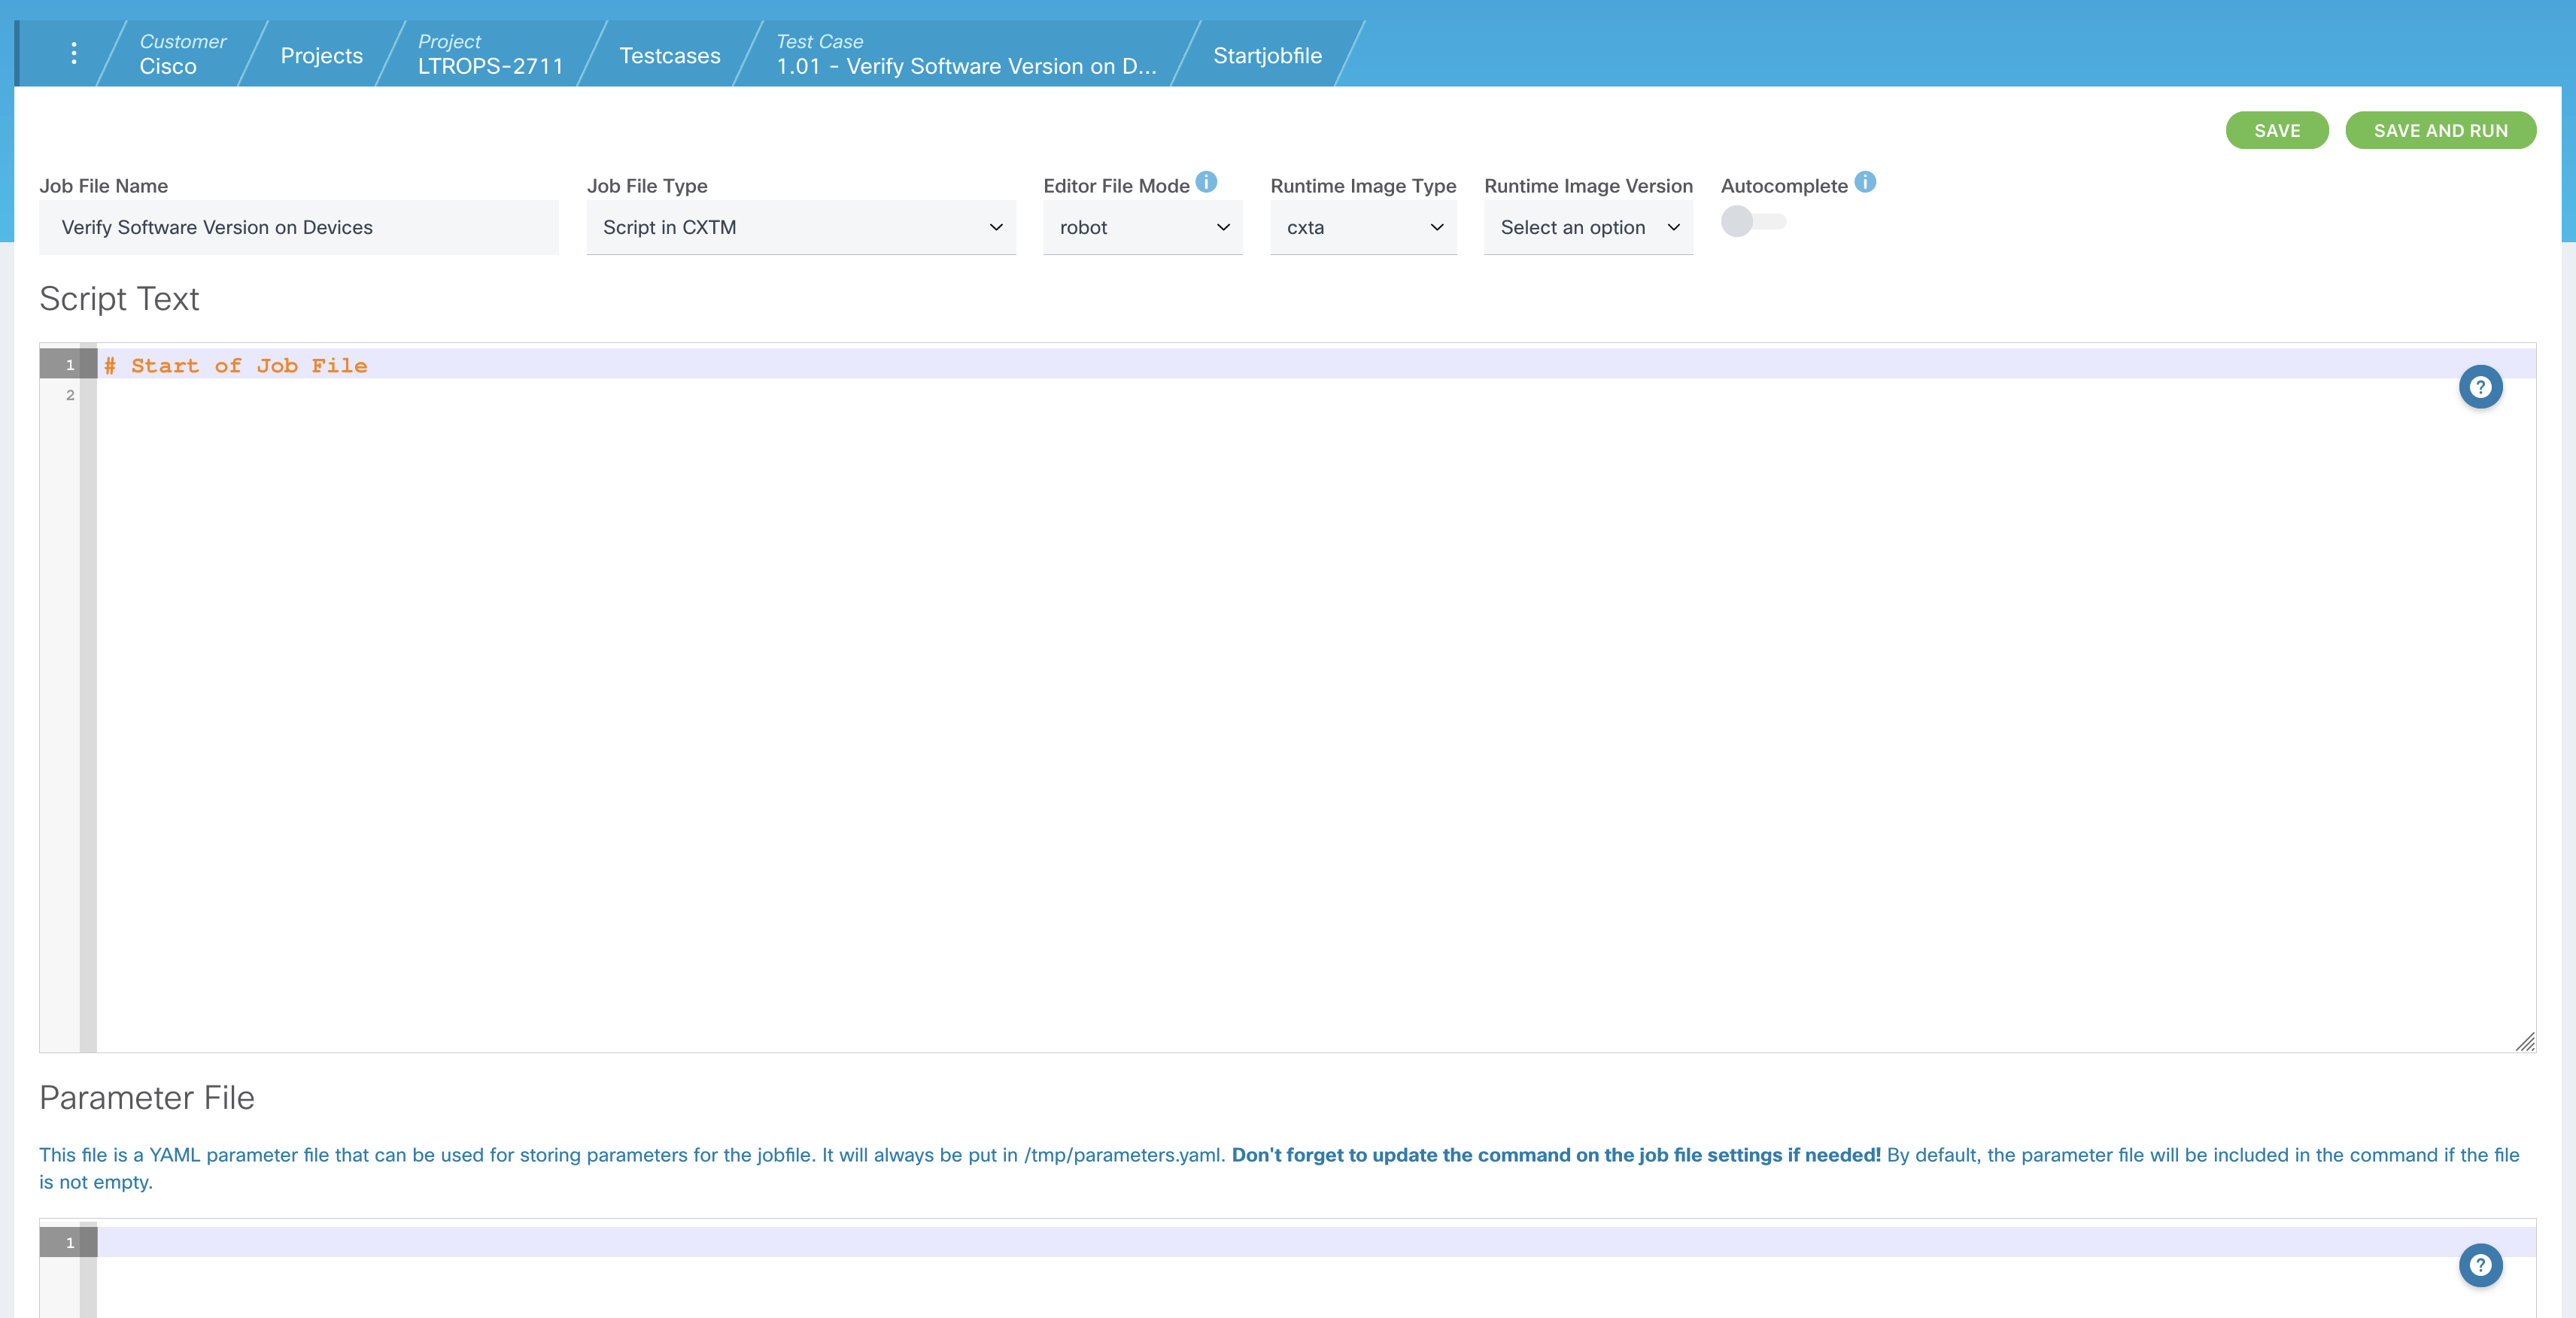
At the top of the page, select the following options from the dropdowns:

The Job File Name defaults to the test case name. The Job File Type can either be Script in CXTM or Script in Git Repo if Git integration is configured and job files are stored in a source control repository. The Editor File Mode informs the editor of the language used in the Job File to provide the correct syntax highlighting, and the Runtime Image dropdown selects the CXTA version to be used by the Job File.
With these selections confirmed, you will develop the Job File itself next.
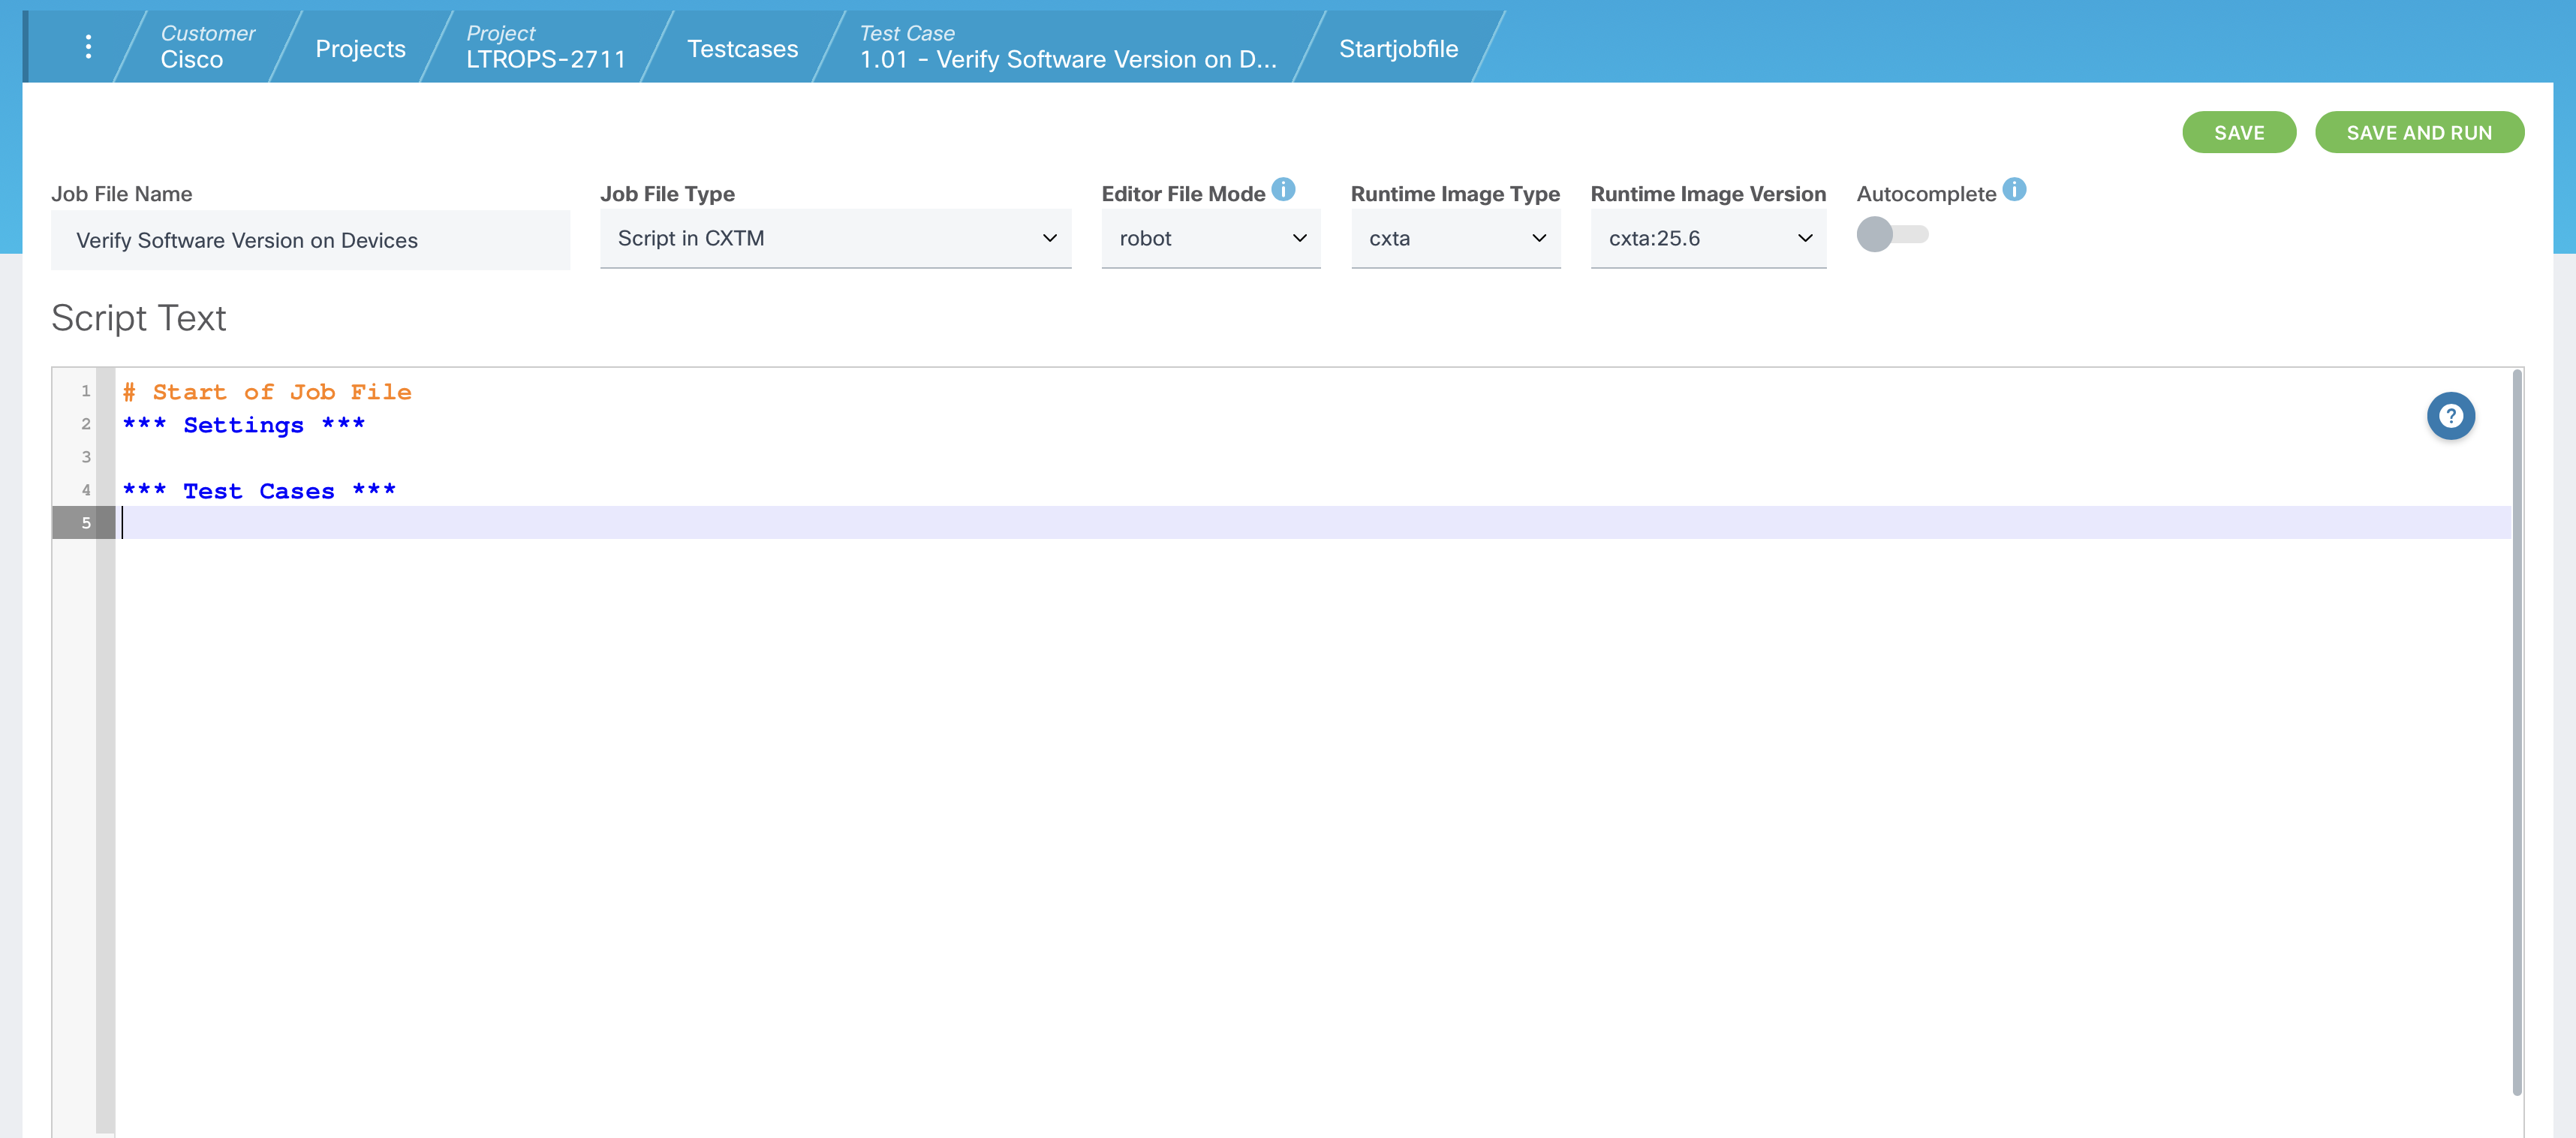
*** Settings *** and *** Test Cases *** sections
by copying the Robot code below into your Job File, beginning on line 2.
*** Settings ***

*** Test Cases ***
As previously mentioned, Robot Job Files are organized into sections separated by section headers. You'll use
*** Settings *** to import Libraries and Resource files, and *** Test Cases ***
to define your test case procedures. You won't define variables or keywords directly in this example, so you do not need to include the
*** Variables *** or *** Keywords *** sections.
*** Settings ***
Library  CXTA
Resource  cxta.robot
Library  BuiltIn

*** Test Cases ***
In the code snippet above, Library CXTA and Resource cxta.robot
import the CXTA library and Keywords into the test case, and Library BuiltIn imports Builtin, one of the
standard libraries distributed with open source Robot Framework. Notice the spacing used to comply with the space separated format.
Suite Setup and
Suite Teardown
*** Settings ***
Library  CXTA
Resource  cxta.robot
Library  BuiltIn

Suite Setup         Run Keywords
...                 load testbed

Suite Teardown      Run Keywords
...                 Disconnect From All Devices

*** Test Cases ***
In addition to importing Libraries and Resources, *** Settings *** is also where
Suite Setup and Suite Teardown procedures are defined.
A test suite is all of the Test Cases, or procedures, in the *** Test Cases *** section of the Job File.
The suite setup and teardown are keywords that can take arguments. A suite setup is executed before running any of the suite's test cases, so
it's ideal for executing any prerequisite checks or actions that need to be done before executing the suite of test cases. In this example,
suite setup is used to run the load testbed keyword to access the devices defined on your Devices page earlier.
The suite teardown, as you might imagine, is executed after all other test cases in the suite have been executed, and is used for cleaning up at the
end of a Job File. As such, the suite teardown is executed even if there are failures in either the suite setup or in any of the test cases in the suite.
Similarly, all the keywords in a suite teardown are executed even if one of them fails. In this example, the suite teardown is used to run the
Disconnect From All Devices keyword to terminate the connections to your devices under test, and gracefully
exit the test case.
Run Keywords is in fact itself a keyword. It's included in the BuiltIn library that you imported above and
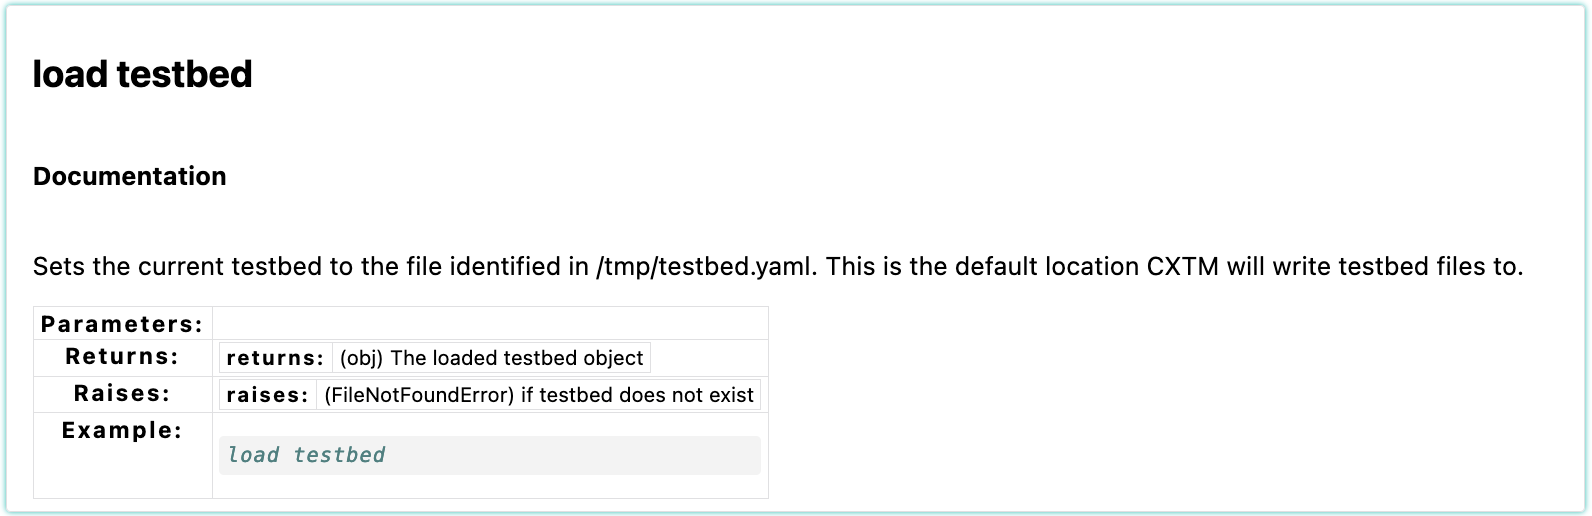
can accept a list of keywords as arguments. In contrast, both load testbed and
Disconnect From All Devices are CXTA.robot keywords developed by Cisco.
These keywords, and all the others covered in this lab, are documented in the Keyword Index of the Robot Documentation included in CXTM. Navigate to the CXTA Keyword Index that is included in the Robot Documentation of your CXTM instance. Locate the link to the Keyword Index from the menu on the left, use "Ctrl+F" to search for load testbed, , and click on the link for "load testbed". (Use your CXTM username and password if prompted for authentication)
The *** Settings *** section of your Job File is complete. Next, you'll create the procedure to
connect to devices in your testbed.
*** Test Cases ***
section
*** Settings ***
Library  CXTA
Resource  cxta.robot
Library  BuiltIn

Suite Setup         Run Keywords
...                 load testbed

Suite Teardown      Run Keywords
...                 Disconnect From All Devices

*** Test Cases ***
1. CONNECT TO DEVICES
    [Documentation]    Connect to all devices in the devices list.
    FOR  ${DEVICE}  IN  @{DEVICES}
        ${status}=  Run Keyword And Ignore Error  connect to device "${DEVICE}"
        IF  '${status[0]}' == 'FAIL'
            Fail  ++UNSUCCESSFUL++ ${DEVICE} not connected
        ELSE
            set test message  ++SUCCESSFUL++ ${DEVICE} connected \n  append=True
        END
    END
Here is a brief explanation of the keywords and code just added to your test case.
| Keyword | Description |
|---|---|
| Run Keyword And Ignore Error | From BuiltIn. Runs the keyword that is passed in as an argument. Returns either PASS or FAIL, and either the return value of the keyword or the received error message, which gets stored in ${status} in this example |
| connect to device "${device}" | From CXTA.robot. Passed in as an arg to the keyword above. Connects to the device passed in as an arg (the ${DEVICE} var in this example) |
| Fail | From BuiltIn. Fails the test with the given message ("++UNSUCCESSFUL++ ${DEVICE} not connected" in this example) |
| set test message | From BuiltIn. Sets the given test message ("++SUCCESSFUL++ ${DEVICE} connected" in this example) |
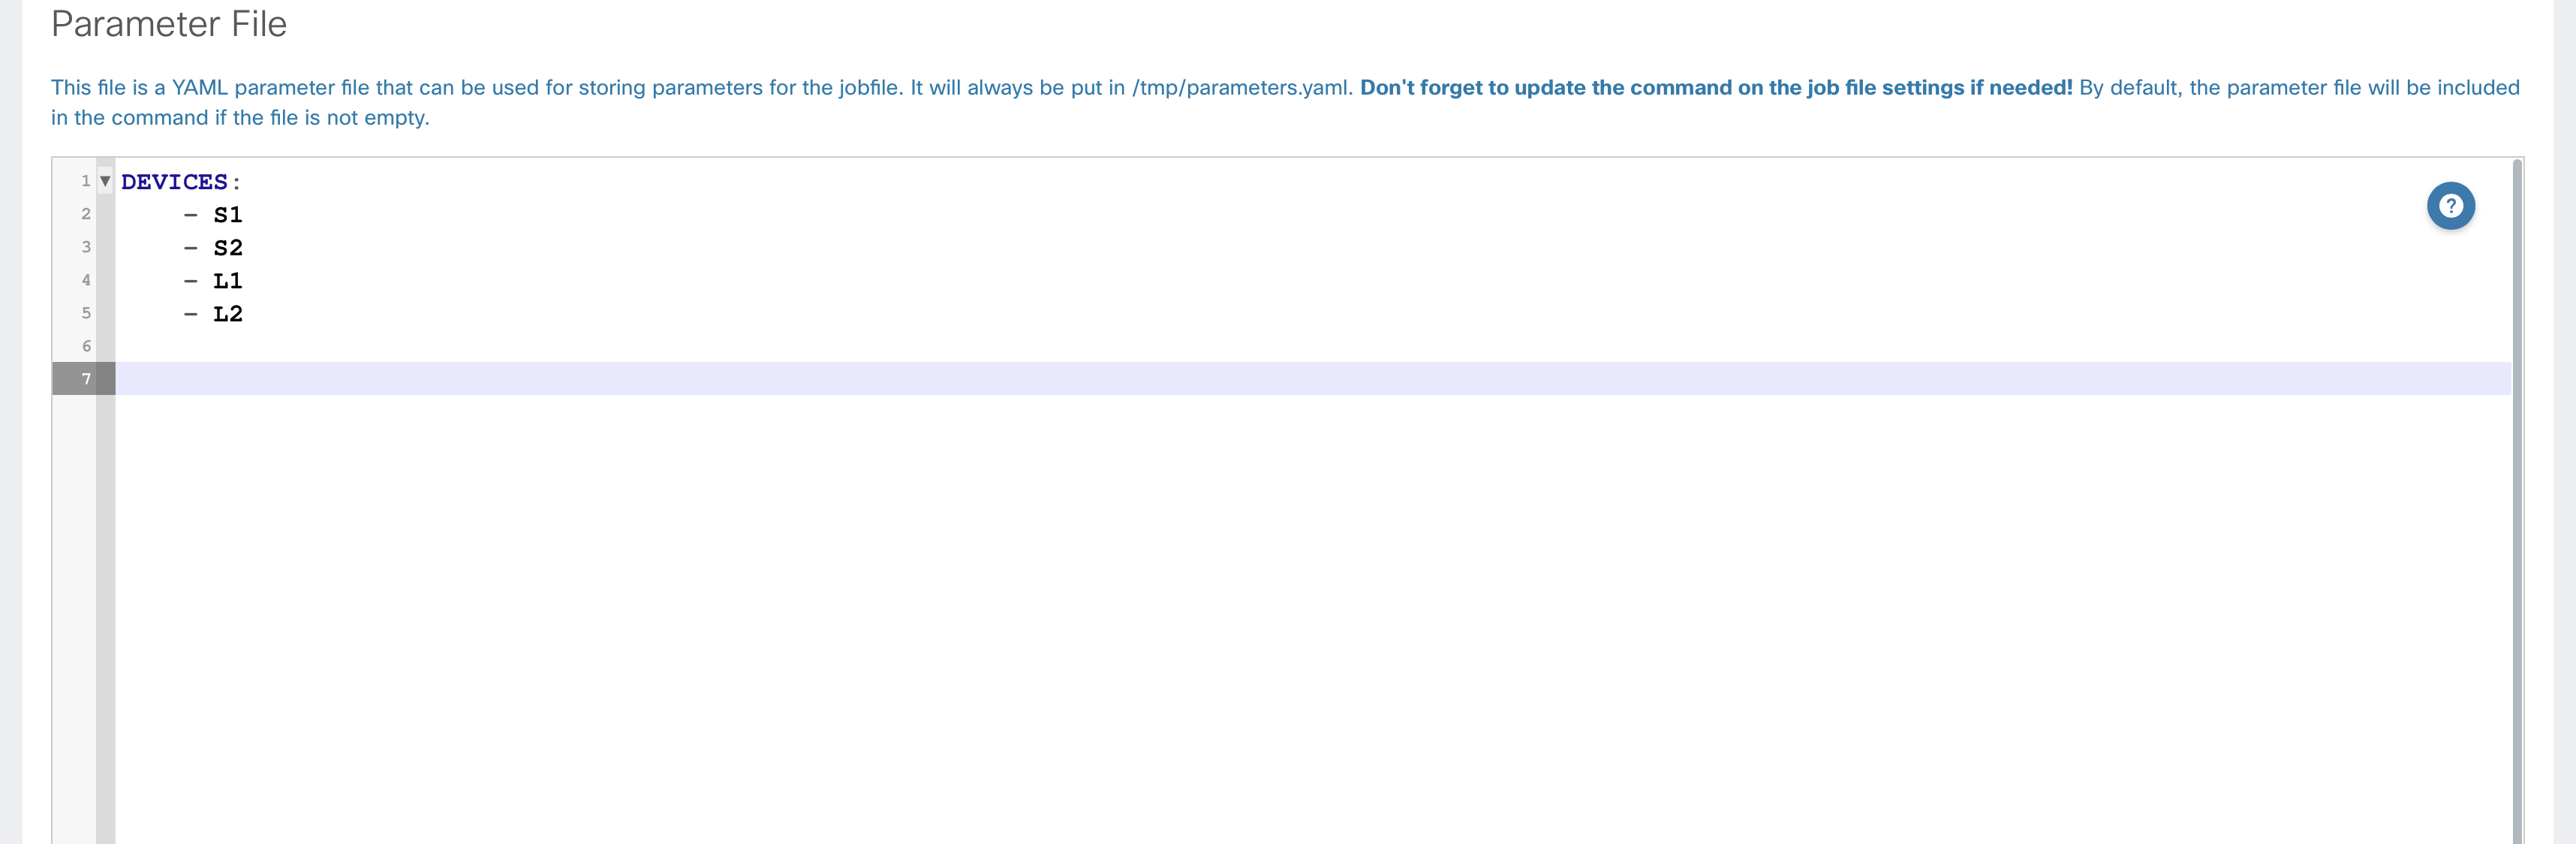
The procedure added above introduced an undefined variable (DEVICES). In this step, you'll define the variable in the Parameter File editor. Variables defined in Parameter File editor are always put in the /tmp/parameters.yaml file and accessible at run time.
In the Parameter File editor:
NOTE: You may need to scroll down to see the Parameter File section.
DEVICES:
    - S1
    - S2
    - L1
    - L2
Your Parameter File editor should look like the following example.
Now that you have defined the variable used in the "CONNECT TO DEVICES" step, you will add another step to your job file to verify the software version running on these devices.
The next step that you'll add to your test case introduces new keywords to the Job File. One of which belongs to the Collections
library, so you'll need to import that library into your Job File under the *** Settings ***
section.
Library Collections to line 7 of your Job File
*** Settings ***
Library  CXTA
Resource  cxta.robot
Library  BuiltIn
Library  Collections

Suite Setup         Run Keywords
...                 load testbed

Suite Teardown      Run Keywords
...                 Disconnect From All Devices

*** Test Cases ***
1. CONNECT TO DEVICES
    [Documentation]    Connect to all devices in the devices list.
    FOR  ${DEVICE}  IN  @{DEVICES}
        ${status}=  Run Keyword And Ignore Error  connect to device "${DEVICE}"
        IF  '${status[0]}' == 'FAIL'
            Fail  ++UNSUCCESSFUL++ ${DEVICE} not connected
        ELSE
            set test message  ++SUCCESSFUL++ ${DEVICE} connected \n  append=True
        END
    END
*** Test Cases ***
section
*** Settings ***
Library  CXTA
Resource  cxta.robot
Library  BuiltIn
Library  Collections

Suite Setup         Run Keywords
...                 load testbed

Suite Teardown      Run Keywords
...                 Disconnect From All Devices


*** Test Cases ***
1. CONNECT TO DEVICES
    [Documentation]    Connect to all devices in the devices list.
    FOR  ${DEVICE}  IN  @{DEVICES}
        ${status}=  Run Keyword And Ignore Error  connect to device "${DEVICE}"
        IF  '${status[0]}' == 'FAIL'
            Fail  ++UNSUCCESSFUL++ ${DEVICE} not connected
        ELSE
            set test message  ++SUCCESSFUL++ ${DEVICE} connected \n  append=True
        END
    END

2. VERIFY SOFTWARE VERSION
    [Documentation]    Verify devices are running the expected software versions.
    FOR  ${DEVICE}  IN  @{DEVICES}
	    ${output}=  parse "show version" on device "${DEVICE}"
        ${version}=  Get From Dictionary  ${output['platform']['software']}  system_version
        IF  '${version}' == '${EXPECTED_VERSION}'
            Set Test Message    ++SUCCESSFUL++ ${DEVICE} running expected version ${version}\n    append=True
        ELSE
        	Fail    ++UNSUCCESSFUL++ ${DEVICE} running ${version}, expected ${EXPECTED_VERSION}
        END
    END
Here is a brief explanation of the new keywords and code just added to your test case.
| Keyword | Description |
|---|---|
| parse "${parser}" on device "${device}" | From genie.libs.robot.GenieRobot. Executes the command on the device and parses the output into a dictionary. In this example, the dictionary is stored in ${output} for use in the next line of your Job File. |
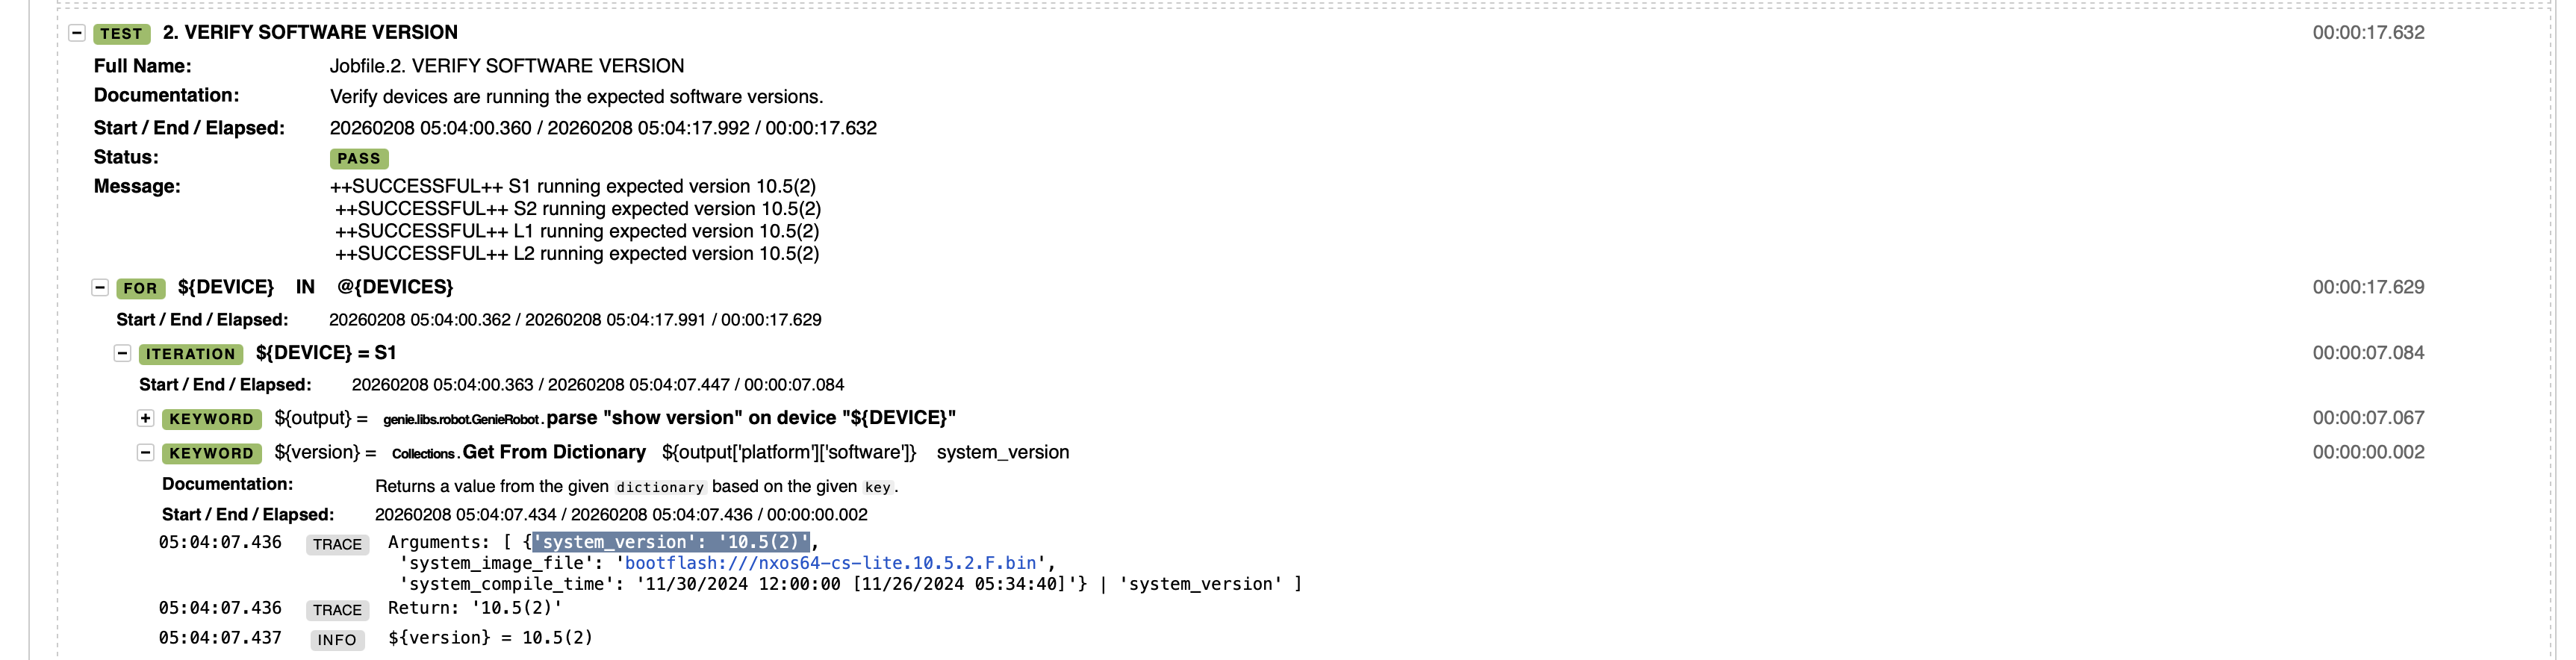
| Get From Dictionary | From Collections. Returns a value from the given dictionary ${output} based on the given key. The key is "system_version" in this example, and the key value is stored in the ${version} variable for evaluation in the next line of your Job File. |
In addition to new keywords, this step also introduced parsers. Parsers essentially take output from CLI-based show commands in human-readable format and turns it into machine-readable structured data in the form of dictionaries.
In this example, the keyword and parser come from the Genie library, which is bundled into CXTA by default. The Genie parsers list and their schemas are publicly available. You can refer to the published schema to identify the dictionary keys needed for your verification requirements.
{
    'platform': {
        <snip>
        'software': {
            Optional('bios_version'): str,
            Optional('bios_compile_time'): str,
            Optional('kickstart_version'): str,
            Optional('kickstart_compile_time'): str,
            Optional('kickstart_image_file'): str,
            Optional('system_version'): str,
            Optional('system_compile_time'): str,
            Optional('system_image_file'): str,
        },
    },
}
The procedure introduced another undefined variable (EXPECTED_VERSION). Define the variable in the Parameter File editor.
In the Parameter File editor:
NOTE: You may need to scroll down to see the Parameter File section.
DEVICES:
    - S1
    - S2
    - L1
    - L2

EXPECTED_VERSION:  10.5(2)
From the Job File editor page you're on:
Congratulations! You have added all of the procedures and variables needed to the run this test case.
# Start of Job File
*** Settings ***
Library CXTA
Resource cxta.robot
Library BuiltIn
Library Collections
Suite Setup Run Keywords
... load testbed
Suite Teardown Run Keywords
... Disconnect From All Devices
*** Test Cases ***
1. CONNECT TO DEVICES
[Documentation] Connect to all devices in the devices list.
FOR ${DEVICE} IN @{DEVICES}
${status}= Run Keyword And Ignore Error connect to device "${DEVICE}"
IF '${status[0]}' == 'FAIL'
Fail ++UNSUCCESSFUL++ ${DEVICE} not connected
ELSE
set test message ++SUCCESSFUL++ ${DEVICE} connected \n append=True
END
END
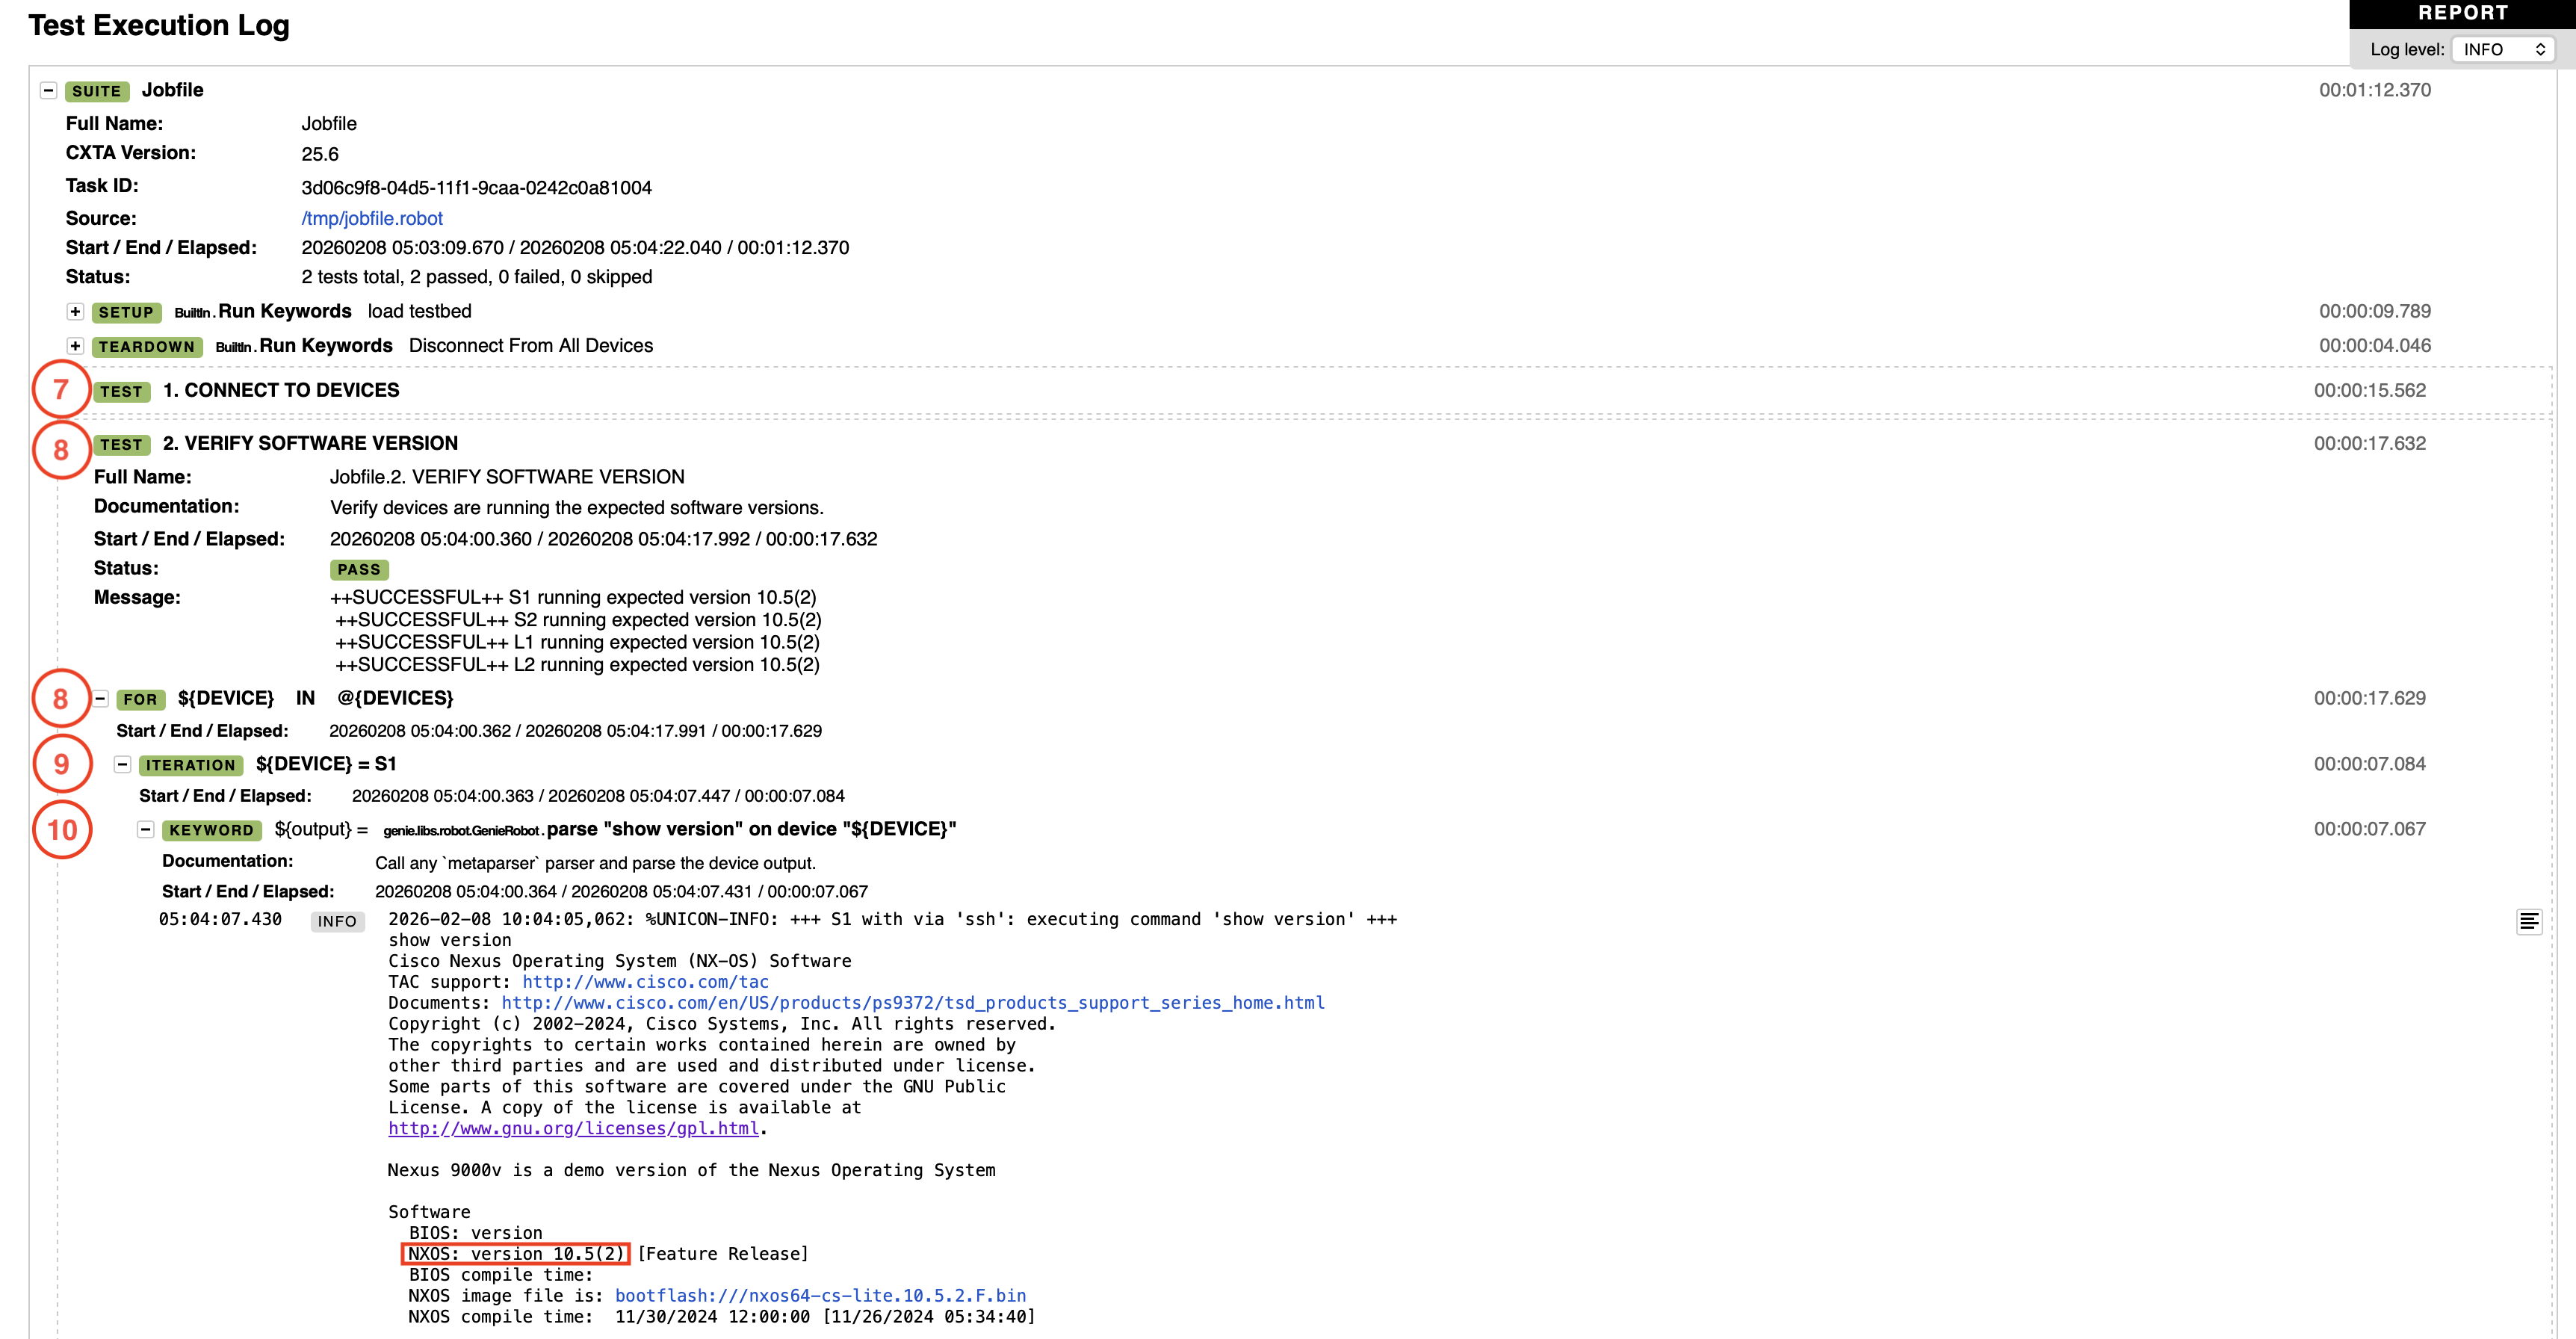
2. VERIFY SOFTWARE VERSION
[Documentation] Verify devices are running the expected software versions.
FOR ${DEVICE} IN @{DEVICES}
${output}= parse "show version" on device "${DEVICE}"
${version}= Get From Dictionary ${output['platform']['software']} system_version
IF '${version}' == '${EXPECTED_VERSION}'
Set Test Message ++SUCCESSFUL++ ${DEVICE} running expected version ${version}\n append=True
ELSE
Fail ++UNSUCCESSFUL++ ${DEVICE} running ${version}, expected ${EXPECTED_VERSION}
END
END
DEVICES:
    - S1
    - S2
    - L1
    - L2

EXPECTED_VERSION:  10.5(2)

If you receive an "Unauthorized. Please login" error message, your session to CXTM has timed out. Please refresh the page, login again if prompted, paste in the code above into the Script Text and Parameter File fields, and click the SAVE AND RUN button
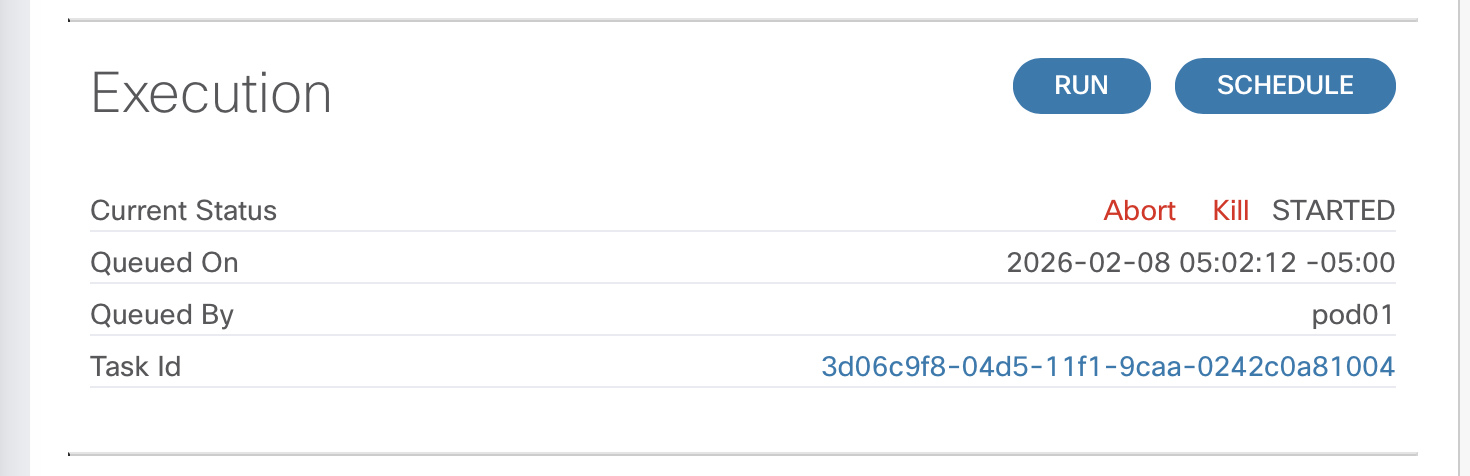
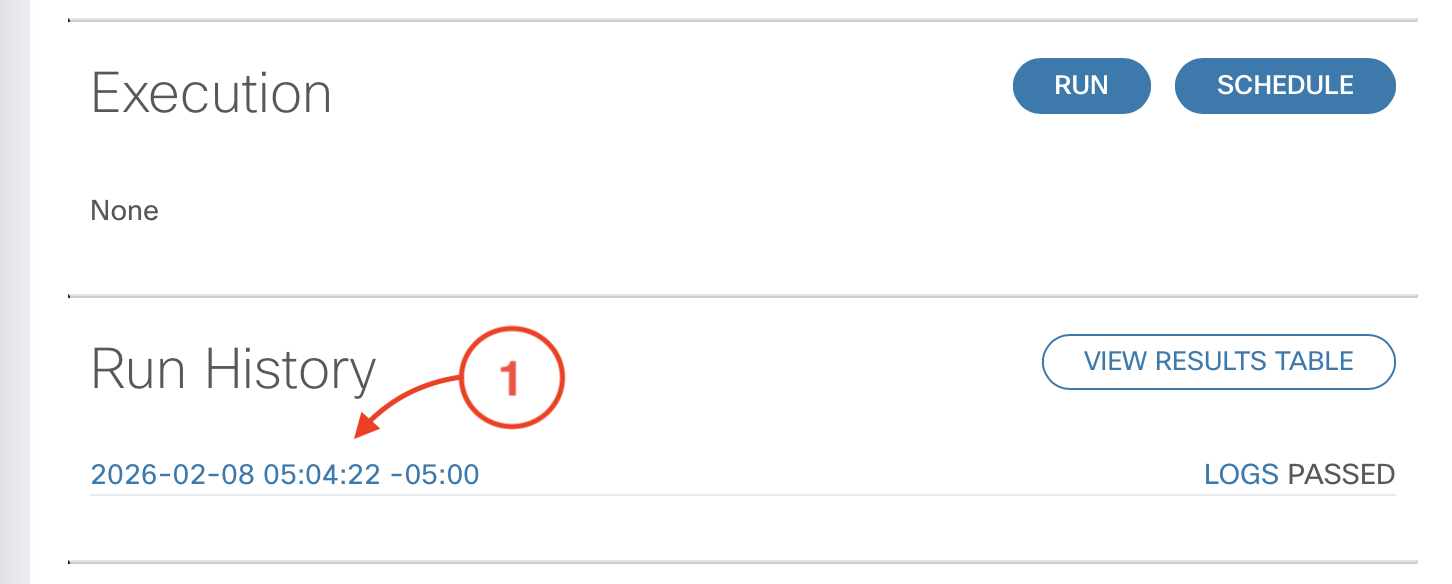
After clicking the SAVE AND RUN button, CXTM will return you to a Job File page where you can access and edit details related to the Job File, including the Execution status, Run History, and more.
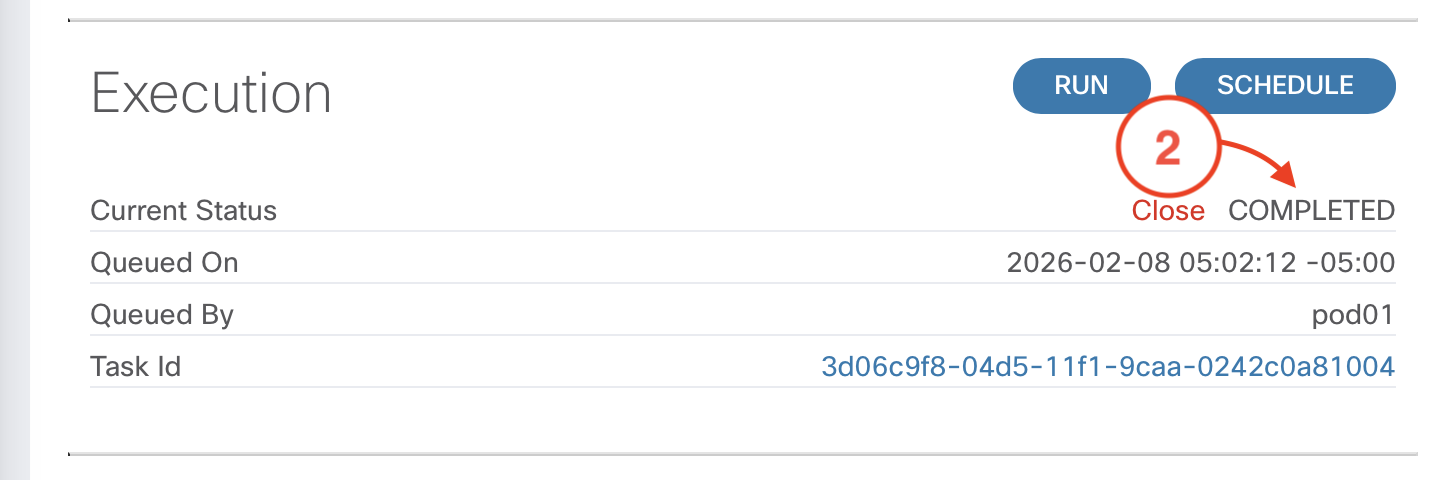
From the test case Job File page:
From the test case Job File page:
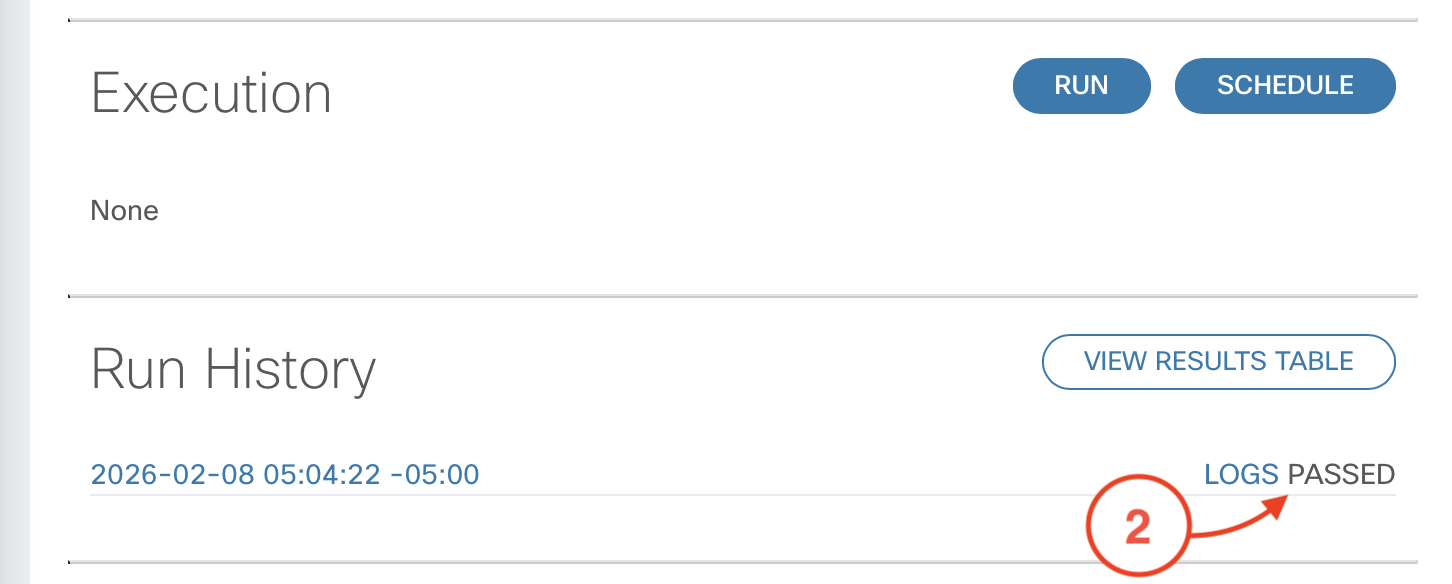
Notify your proctor if your test case result is not PASSED before moving on.
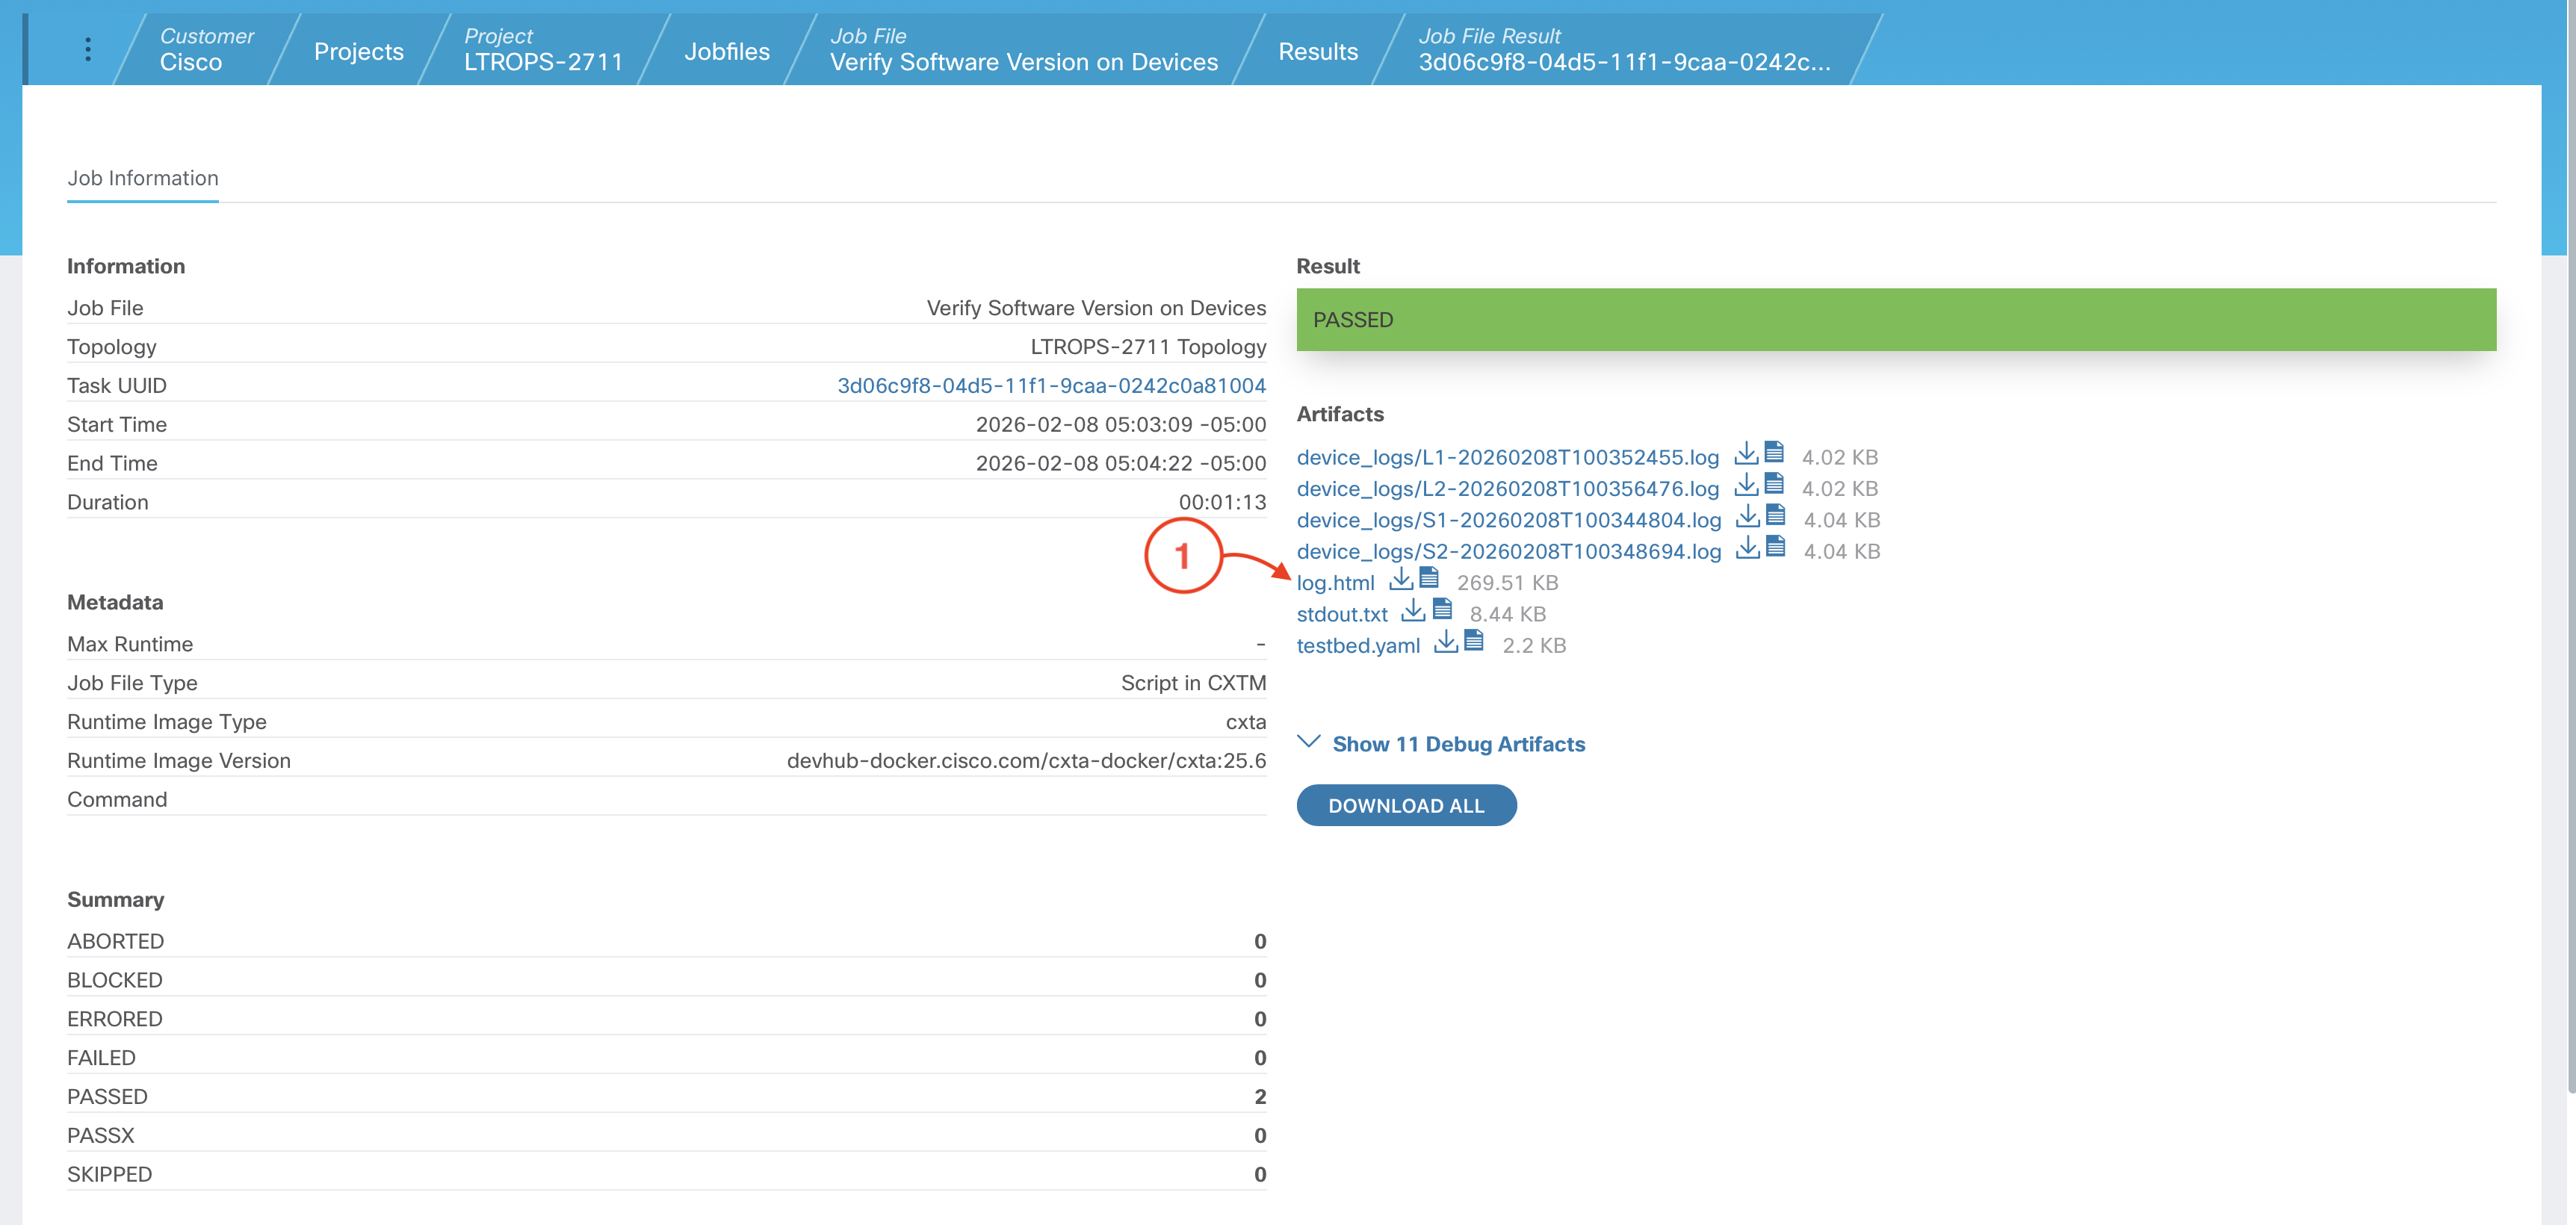
From the test case Job File page:
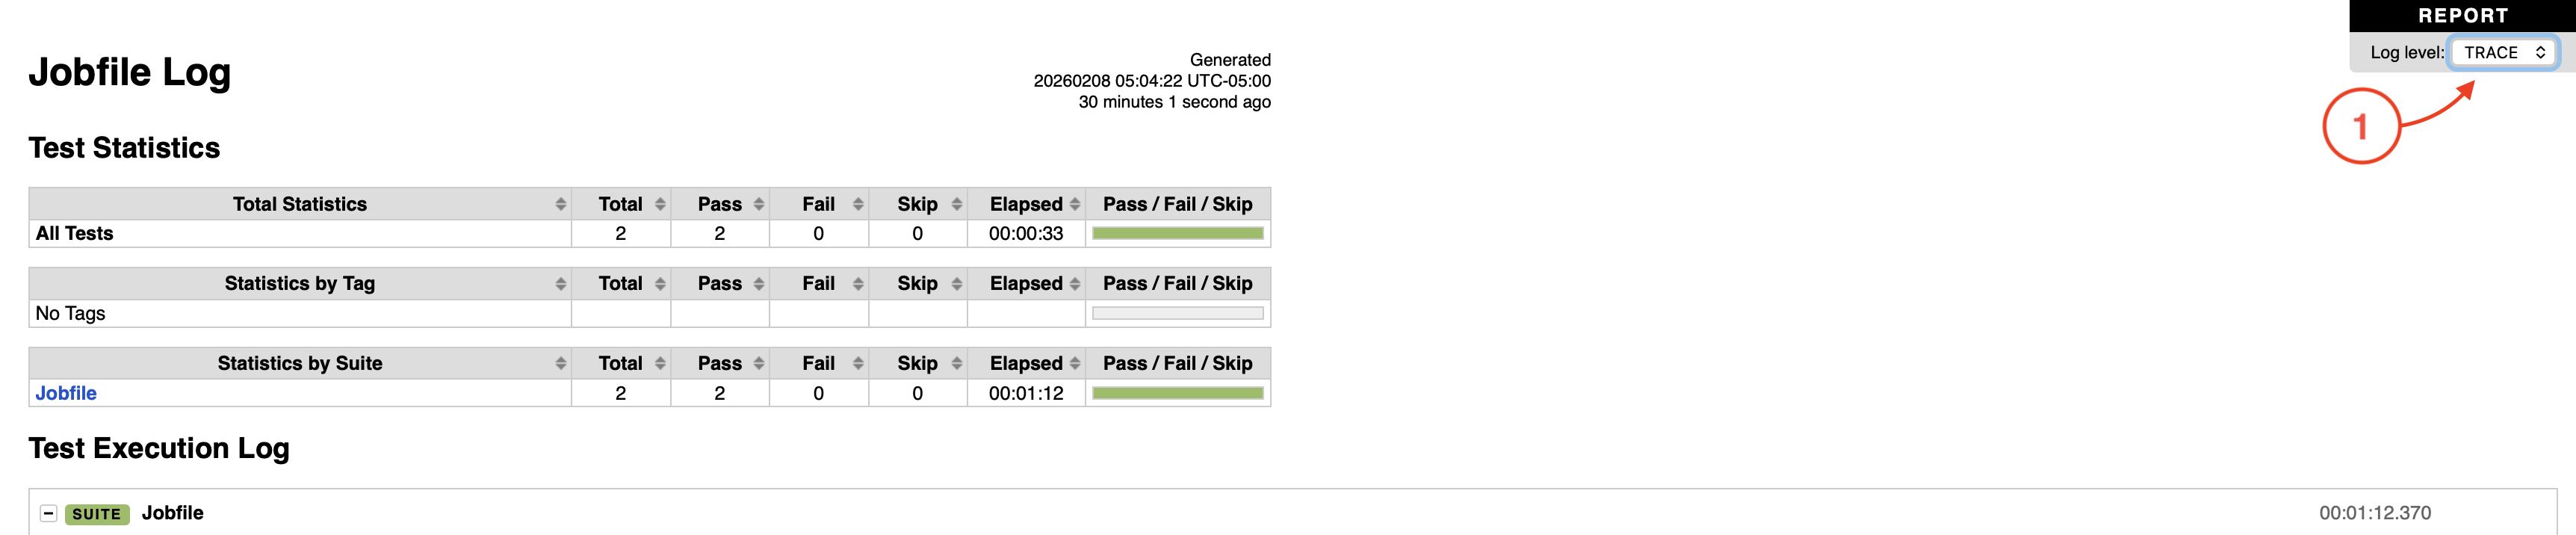
From the Job File Results page:
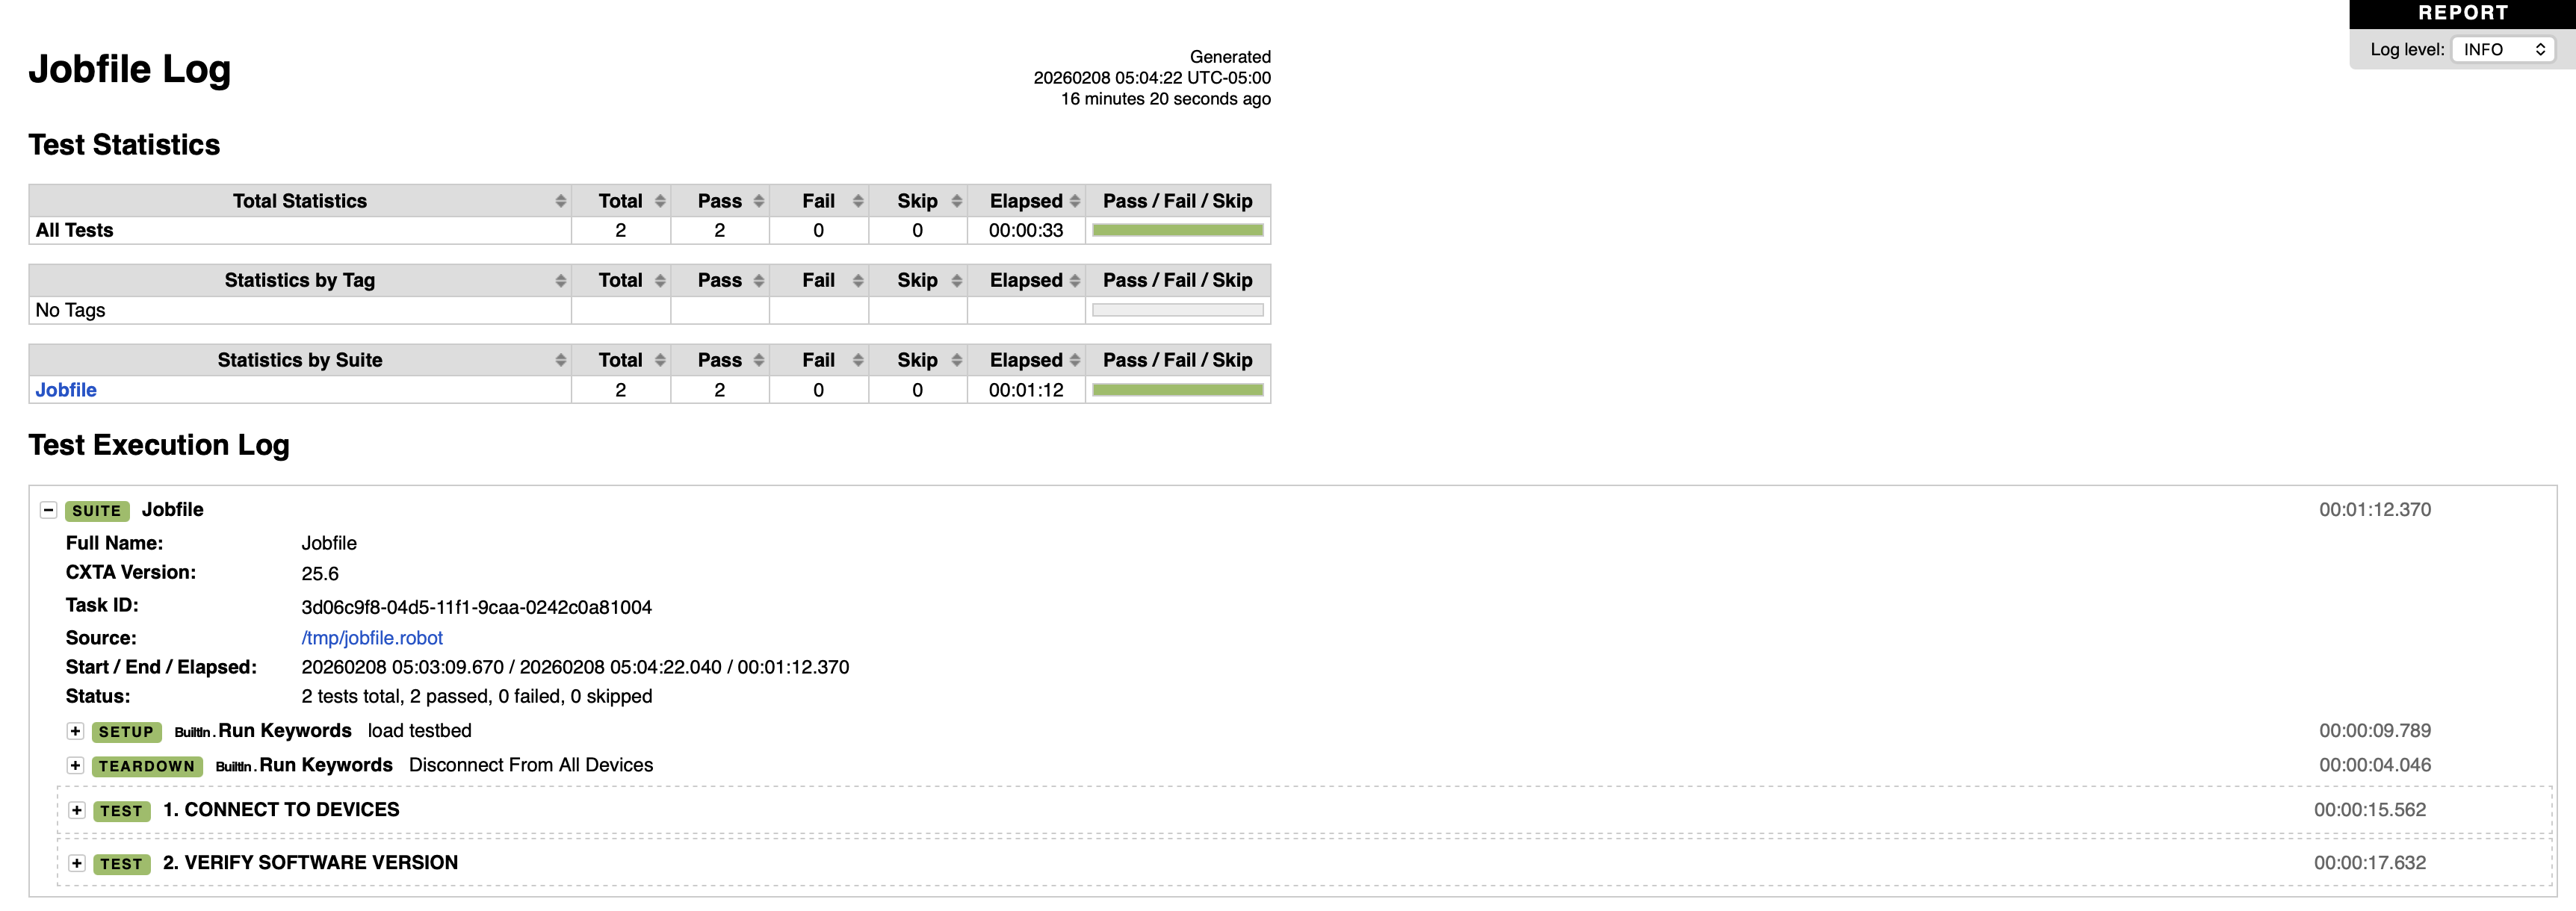
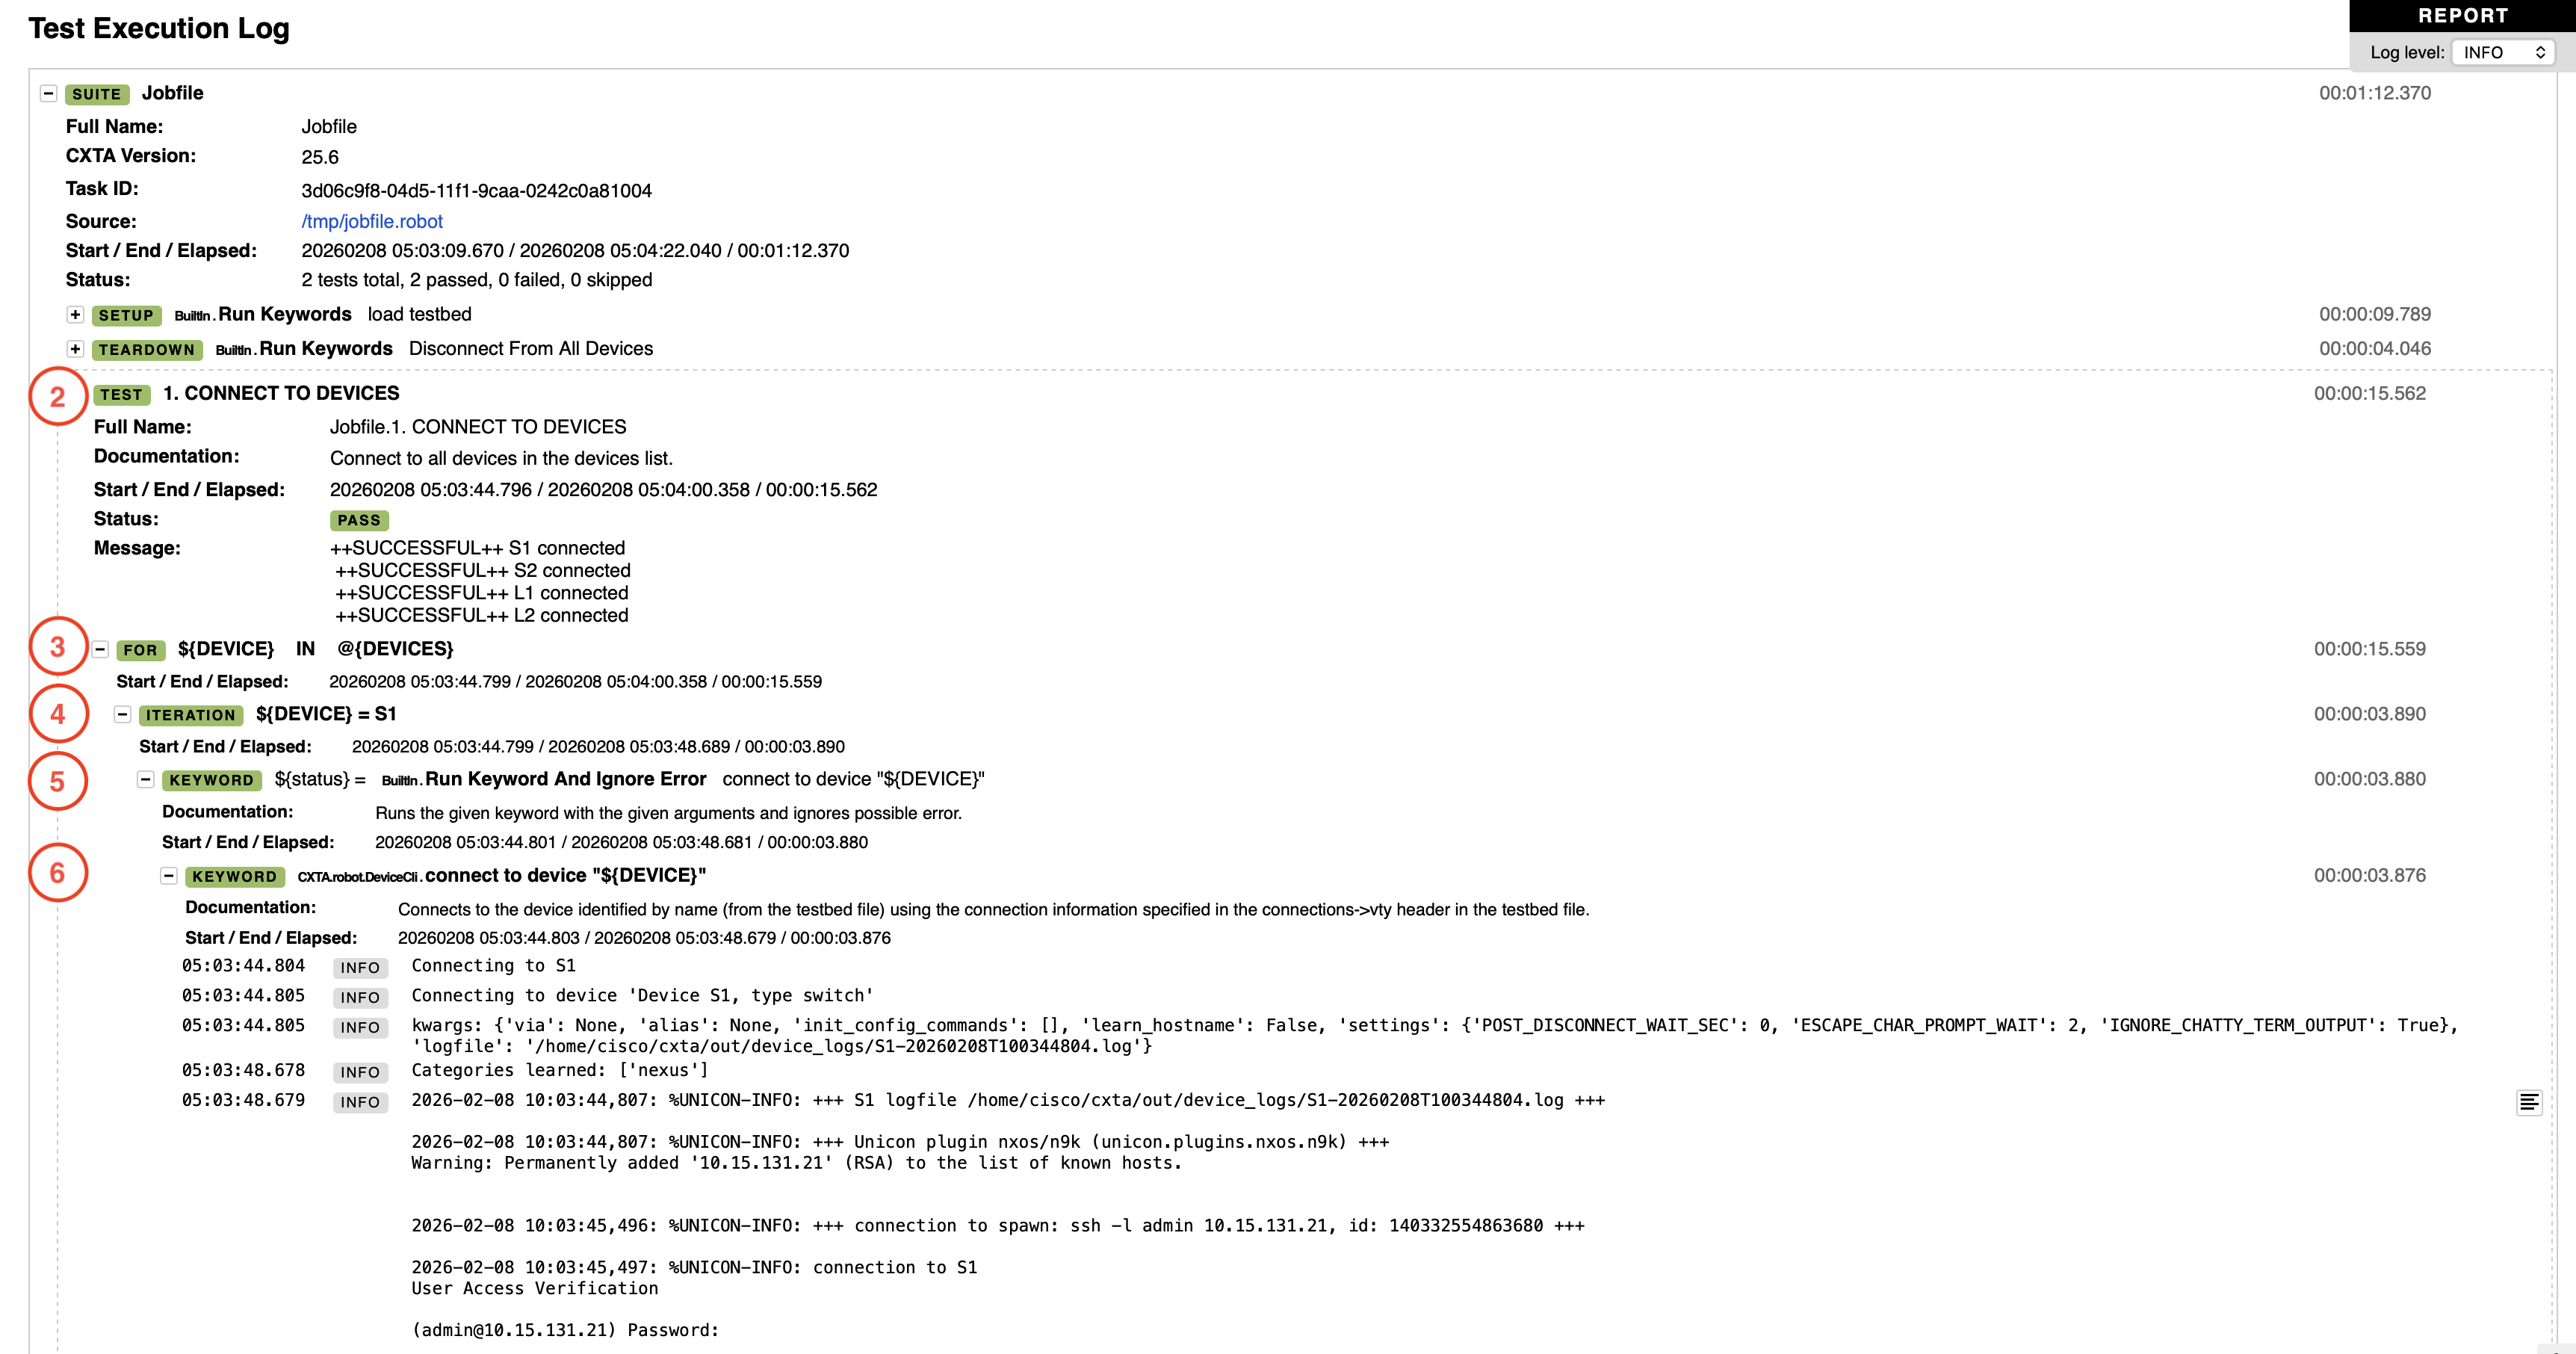
From the Report Log Level dropdown in the upper right-hand corner of the log.html report:

Continue to the next section.